


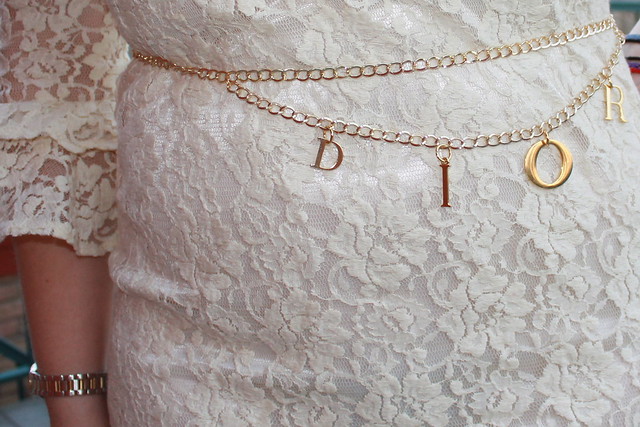
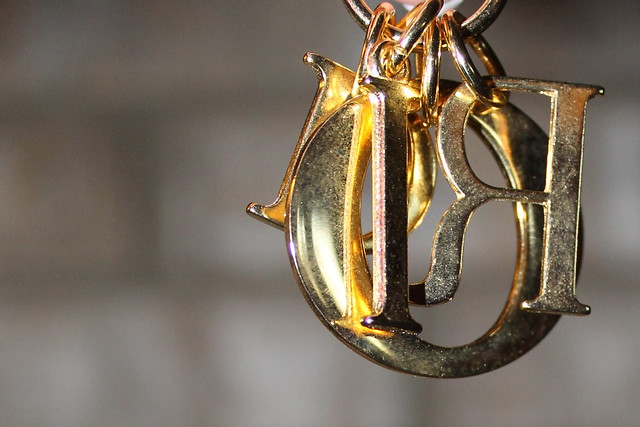
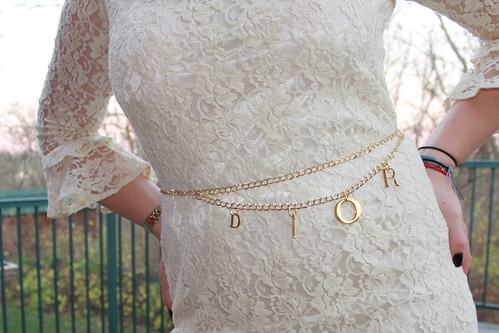
That's what we're going to be making today. But, first, I want to tell you where the idea came from. I've had this Dior keychain for a long time, but I never used it.
Then, when I saw this gorgeous Chanel belt on the lovely Chiara Ferragni of The Blonde Salad, I knew I had to make one like it using the gold letters from my keychain.

Some might say this comes dangerously close to sporting a designer fake, but the thing is that the end design is actually originally mine; after all, there is no Dior belt like this that I'm ripping off. I'm simply repurposing a Dior product by putting my own spin on it and showing Dior some love along the way.
You can make a belt just like this by substituting initial charms, which you can find in the jewelry-making section of any craft store. Make yours say anything you like: "love," "hope," your name, whatever.
You will need:
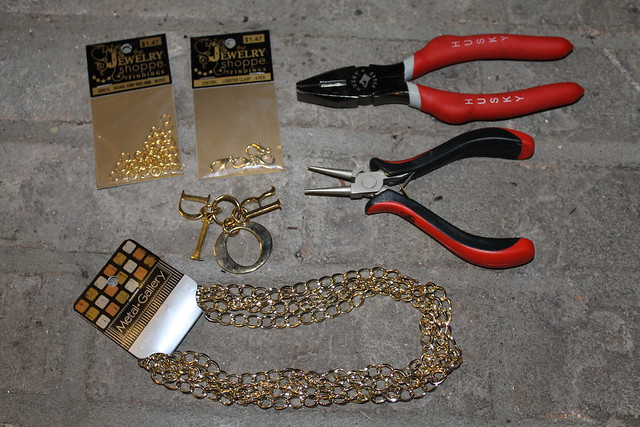
-Letter charms
-About 60 inches of chain (again, jewelry-making section of a craft store)
-A lobster clasp
-Jump rings
-Pliers (one pair of needle nose to open the jump rings, and one flat-nose pair to close them)
-Wire cutters (if your pliers don't double as them)
-A weighty pendant or ring to weigh down the end of the chain (I just used the keychain ring.)
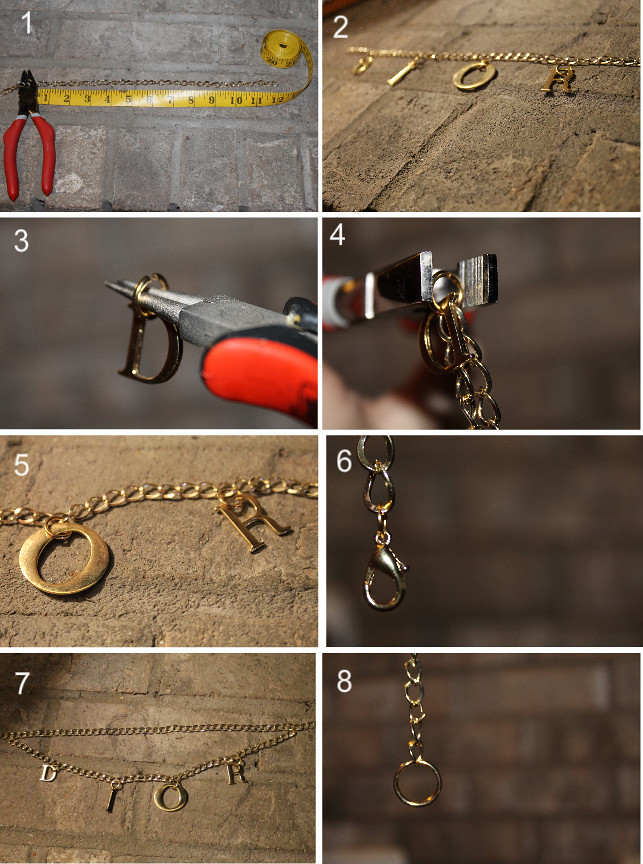
Step 1. Using the wire cutters, cut a length of chain about 12" long.
Step 2. Evenly space your letters out along this length of chain. To find the perfect number of links between each letter, divide the total number of links by the number of letters plus one.
Step 3. Using the needle-nose pliers, open the ring on your first letter.
Step 4. Hook the ring through the appropriate chain link and close it again using the flat-nose pliers.
Step 5. Repeat steps 3 and 4 with each letter, making sure the chain doesn't get twisted and that all the letters lay straight.
Step 6. Using a jump ring, attached the lobster clasp to one end of the remaining, longer length of chain.
Step 7. Using two more jump rings, attached each end of the shorter length of chain (the one with the letters) to the longer length of chain so that it droops slightly. I chose to place mine slightly off center, but it can go anywhere you think looks good: dead center, on one side, etc.
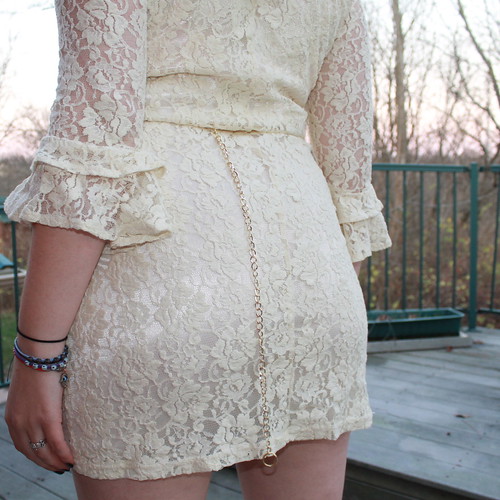
Step 8. Attach the weighty pendant or ring to the other end of the long length of chain (the end that doesn't have the lobster clasp).
Step 9. Fasten the belt around your waist by clipping the lobster clasp to the chain so that the excess hangs down in back.


It looks so wonderful! <3 I love nice and simple DIYs!
ReplyDeletex
Lost in the Haze
Oh wow what a fantastic idea! Looks great with your dress too. I love the long chain at the back x
ReplyDeleteNatalie | Just a Thought
Such a nice idea!! It looks lovely. And I love your dress as well!! :)
ReplyDeleteEly Ann
http://thespicyitalianlife.blogspot.com/
xx xx
Great idea...it looks so cute! Thanks for sharing!
ReplyDeletehttp://woodstockwardrobe.com/
What a great and simple idea!! I found your blog when we were both featured on IFB links this week (because we're awesome)! I'm a new follower. I'd love if you'd stop by my blog some time and say hi, and follow back if you're interested!
ReplyDeleteSarah
http://comingunstitched.blogspot.com
this is awesome! great idea!
ReplyDeleteLovely, especially when worn with the lace!
ReplyDeleteIt looks fantastic. I should start making use out of all the little trinkets I have laying around the house as well. Thanks for the inspiration :)
ReplyDeletexoxo,
Janet
Oh nice! looks very professional! If I were to do that DIY project I'd make it say something quirky :)
ReplyDeletethanks for sharing!
super cute idea, and that lace dress is wonderful!
ReplyDelete<3Meghan
This is a great DIY! I'm impressed - it definitely looks like you bought it in a high end boutique! ;-)
ReplyDeleteThis is such a great DIY idea; Love it. I'm going to have to try this out. The Lace and gold look lovely also.
ReplyDelete-Aisha
The Basic Skinny