Bookish and Belle banner (without tabs) Outfits Recipes Crafts Home Wedding
Showing posts with label DI(fr)Yday. Show all posts

Friday, December 20, 2013

DI(fr)Yday: Embroidered Constellation Christmas Ornaments

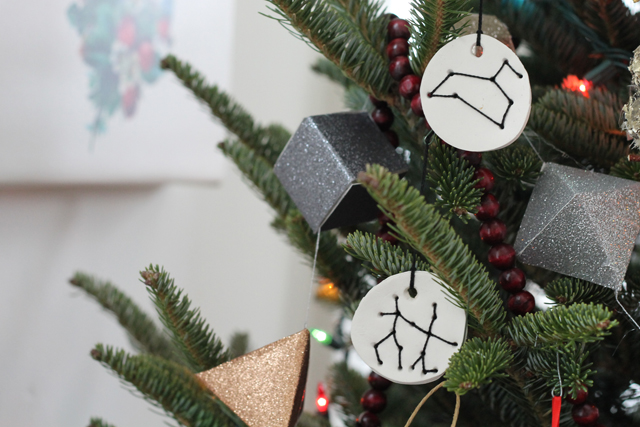
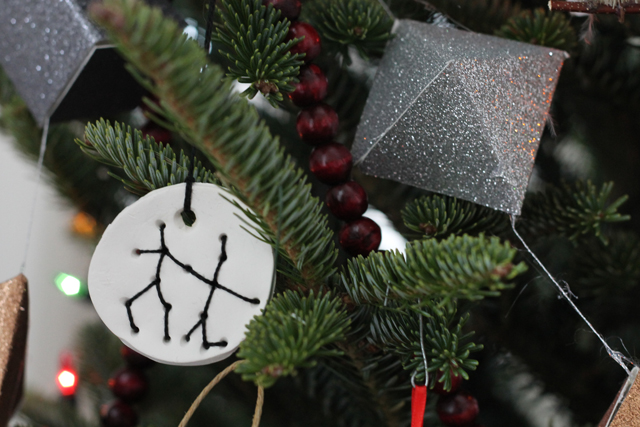
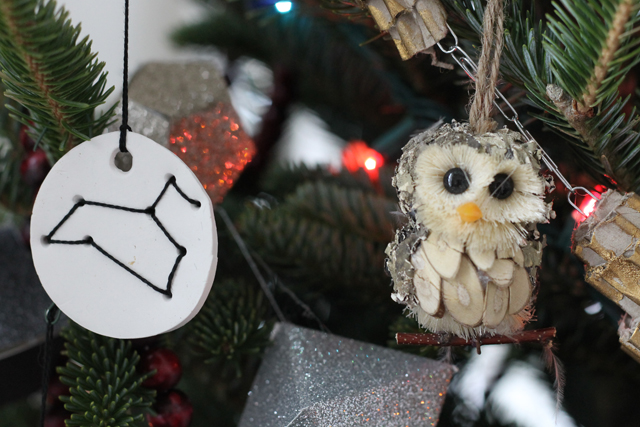
DIY painted sculpy Christmas ornaments and embroidered astrology constellation ornaments

I've been on quite the garland-and-ornament-making kick this Christmas. I really love the simplicity of these DIY clay ornaments, but I wanted to give them my own twist. So I made some simple painted ones and also developed a plan for making embroidered-constellation ones.

I made one with Leo and one with Gemini since those are Ryan's and my sun signs, but I think it would be really cool to do Orion, Ursa Major or another favorite constellation as well.

I followed Kelli's instructions for rolling and cutting the Sculpy, but  before baking, I made small holes for each star with the tip of a toothpick. After the ornaments baked and cooled, I used the running stitch to trace the shape of each constellation with embroidery thread.

I love the way they turned out. Don't you think they'd make great gifts, stocking stuffers, or even personalized gift tags?

DIY painted sculpy Christmas ornaments and embroidered astrology constellation ornaments

signature color

Friday, December 13, 2013

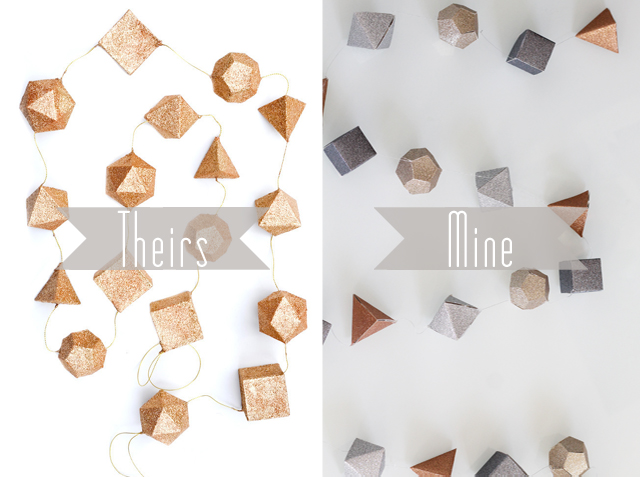
DI(fr)Yday: (Leif-inspired) Glittery Metallic Geometric Garland

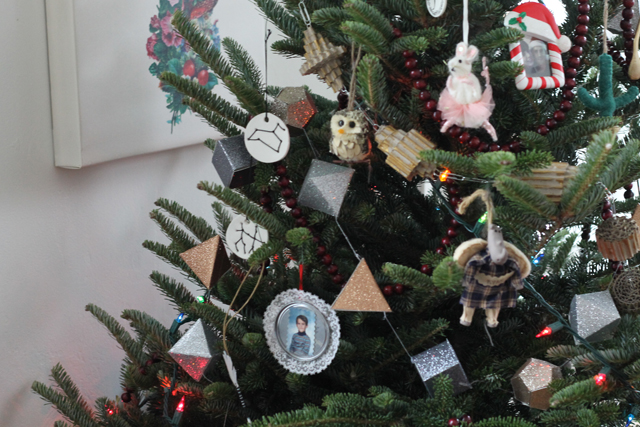
Christmas DIY: (Leif-inspired) glittery geometric garland

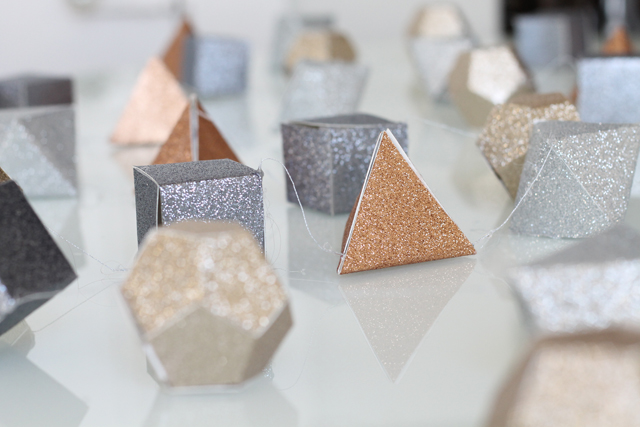
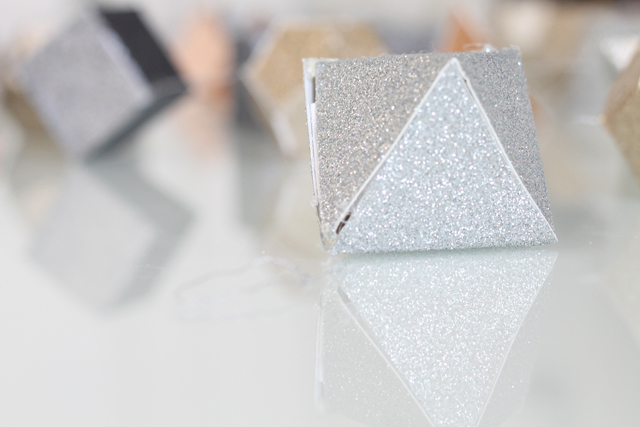
I fell in love with the "Glittered Geometry Garland" at Leif, but decided I could make something similar at home.

Christmas DIY: (Leif-inspired) glittery geometric garland

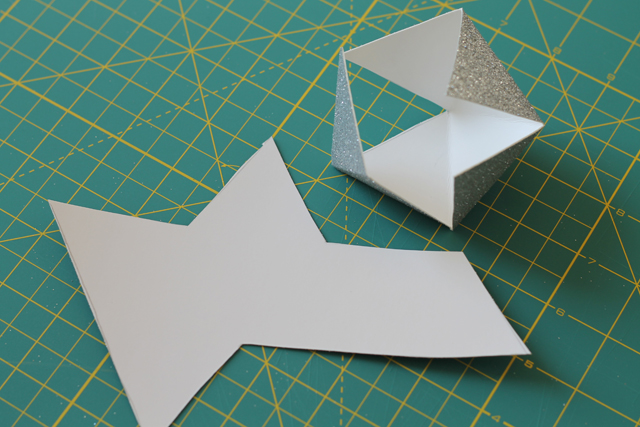
First, I printed 3D shape templates (found here). Then I cut them out of glittered scrapbook paper using an X-Acto knife on a self-healing cutting mat.

Christmas DIY: (Leif-inspired) glittery geometric garland

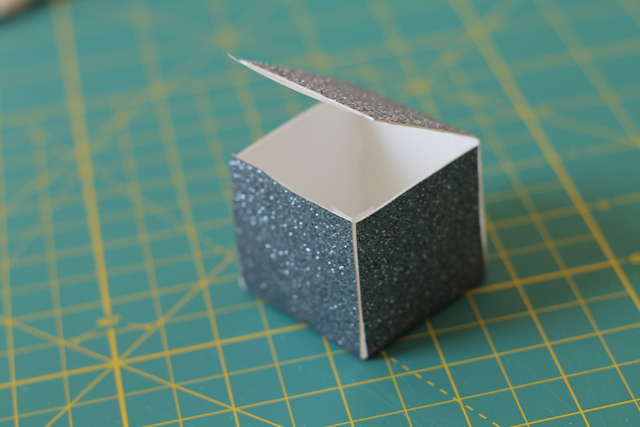
After that, I made up the shapes securing all but one side with Scotch tape on the inside.

Christmas DIY: (Leif-inspired) glittery geometric garland

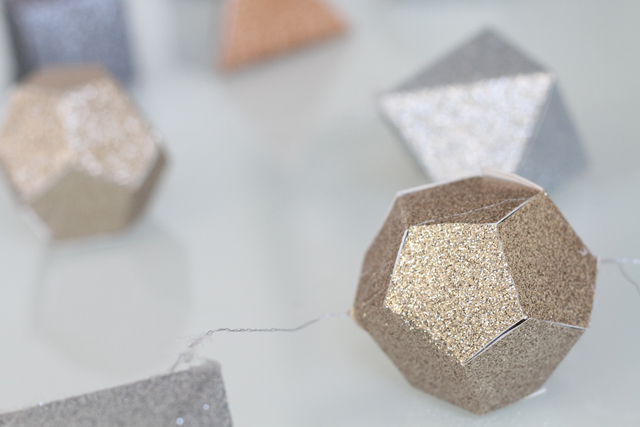
I strung the shapes together with gold embroidery thread and secured the thread at the corners of each shape with some hot glue.

Then I closed up the shapes, securing the final side of the shape with hot glue on a tab of paper.

The whole process took a few days, but I really like the end result, and I think it looks great on our tree.

I wasn't able to photograph every step because I mostly worked on it in the dark after work, but I'd be happy to answer any questions if you decide to make it.

Christmas DIY: (Leif-inspired) glittery geometric garland

signature color

Friday, November 8, 2013

DI(fr)Yday: How to Make Paper Cupcake Toppers with Crepe Paper and Toothpicks

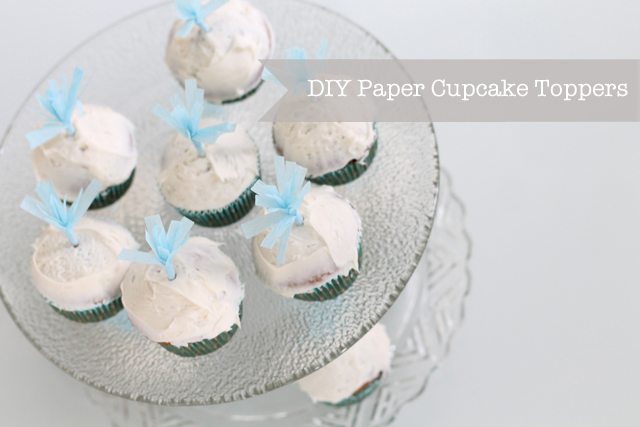
DIY Paper Cupcake Toppers

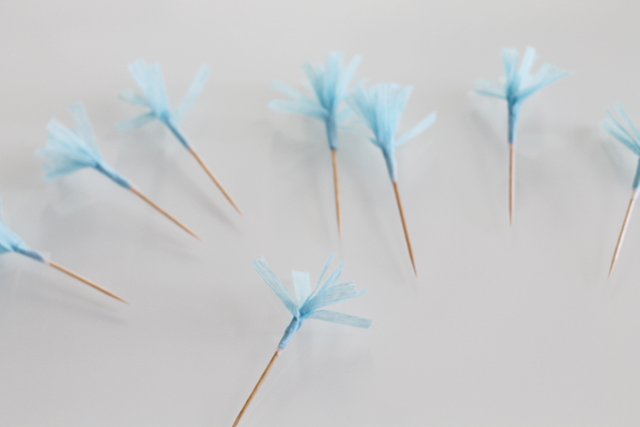
I made these cute little paper cupcake toppers to decorate spice-cake cupcakes for Jenn's sugar-and-spice-themed baby shower. They are so simple and cute, and the use crepe paper, something you might have on hand already if you're throwing a party. 

DIY Paper Cupcake Toppers

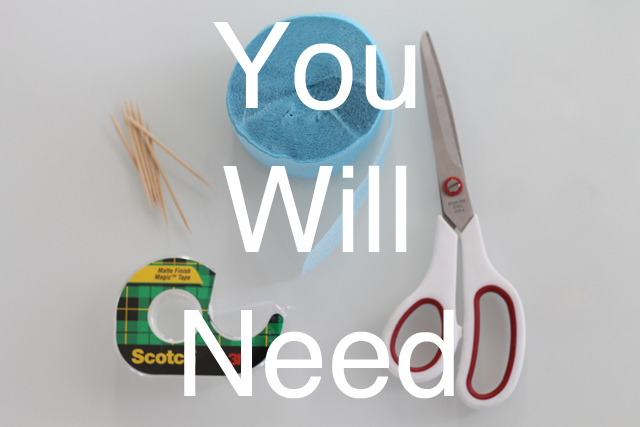
You will need:
Crepe paper
Toothpicks
Scotch tape
Scissors

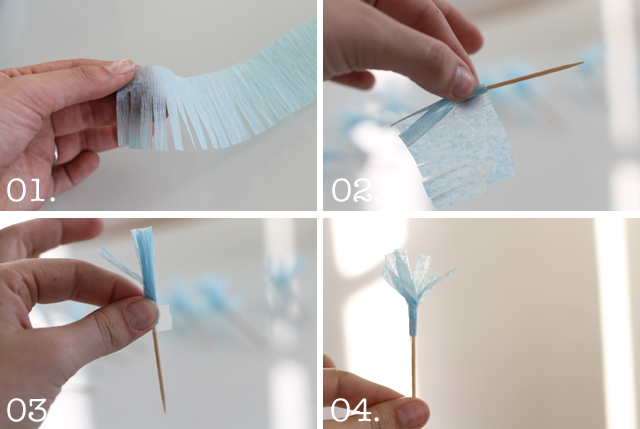
Step 01. Cut your crepe paper into fringe by making slits about every quarter inch or so.
Step 02. Cut a strip that's about three inches long and wrap it tightly around one end of a toothpick.
Step 03. Secure the end with a small piece of Scotch tape.
Step 04. Gently separate the fringy bits with your fingers, fluffing and spreading them until you like the look. 

DIY Paper Cupcake Toppers

signature color

Friday, September 6, 2013

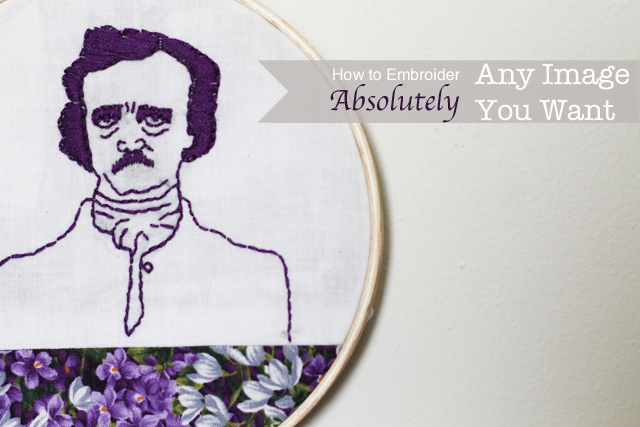
DI(fr)Yday: How to Embroider Absolutely Any Image You Want

How to embroider absolutely any image you want

Embroidery was my favorite craft when I was a kid, probably because I was totally American-Girl-obsessed, but I hadn't embroidered for years when I went to TxSC last month and became newly inspired.

The first thing that inspired me was a workshop where I learned that you can use carbon paper to transfer images from magazines and books onto fabric. No more Hobby-Lobby-kit cottages in the woods or kittens playing with yarn! (Not that I don't love a good cottage or a kitten, but the possibilities when you buy patterns are pretty limited.)

The next thing that inspired me was seeing my friend Chloe's embroidery that she sells on Etsy. Her pieces are so colorful and humorous, and they reminded me how much I used to love embroidery.

How to embroider absolutely any image you want

Before my surge of inspiration, the last thing I'd embroidered was the cross-stich pattern seen here. But lately, I'd been wanting to do something with more detail, a portrait maybe. And, since I'm not the best portrait drawer, carbon paper was going to be my saving grace.

I developed a technique of my own for making complicated images like photos into basic line-drawings that can be transferred with carbon paper onto fabric and stitched over.

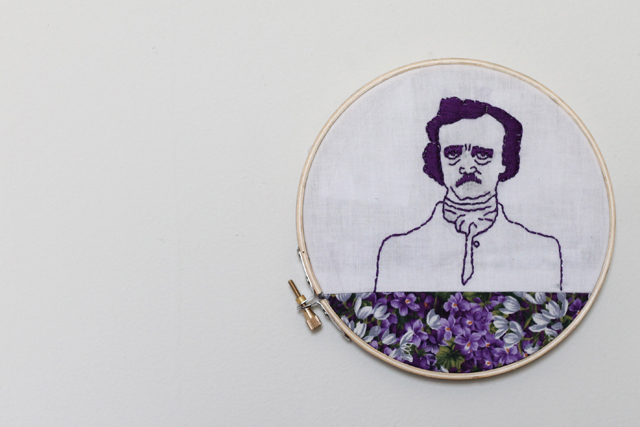
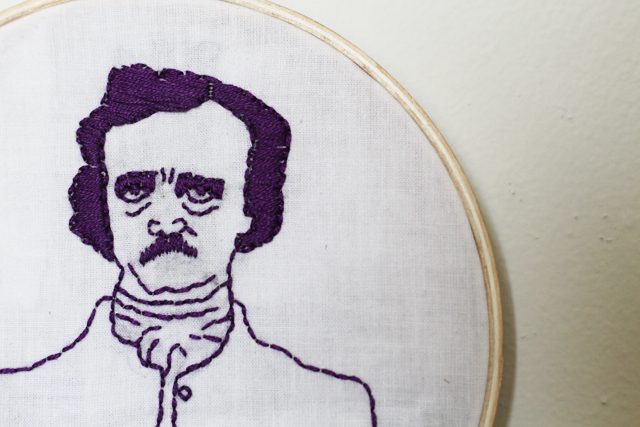
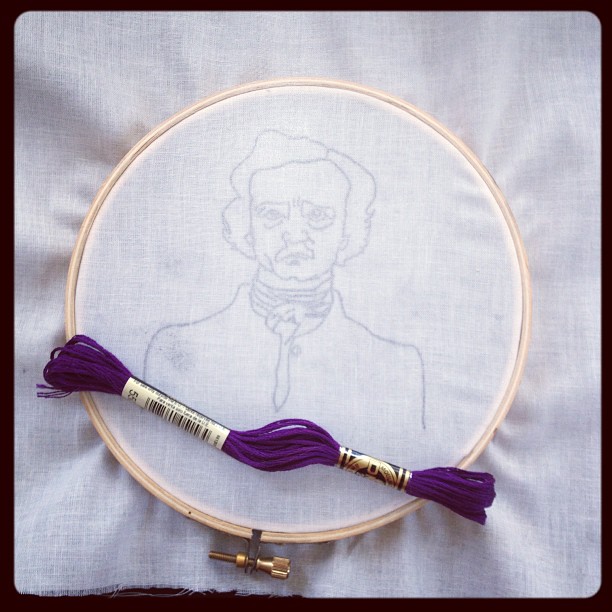
Here's how I created this totally awesome embroidered portrait of Edgar Allan Poe (and how you can create a piece of embroidery out of absolutely any image you want).

How to embroider absolutely any image you want

You will need:
Photoshop or Photoshop Elements
a digital pad or tablet like this one
carbon paper
fabric
embroidery floss
embroidery hoop
a needle

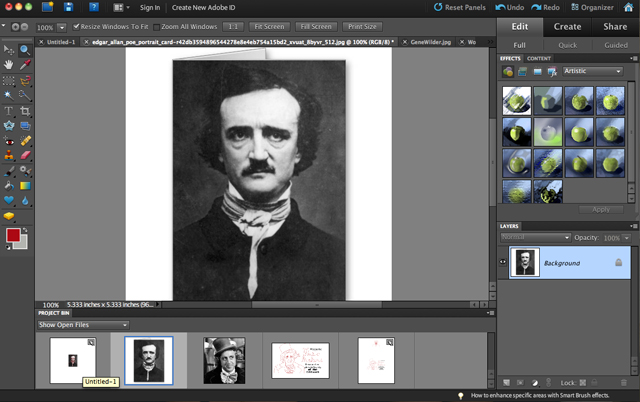
01. Open the image you want to embroider in Photoshop. Create a new file and drag the image into that file.
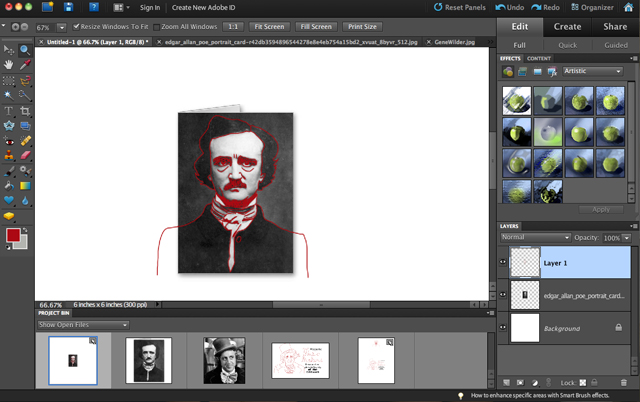
02. Create a new layer and, using the digital drawing pad, trace the important features of the image using a contrasting color. I used red on a black-and-white image. If your image isn't black and white, it helps to convert it to black and white and then trace using a bright color.
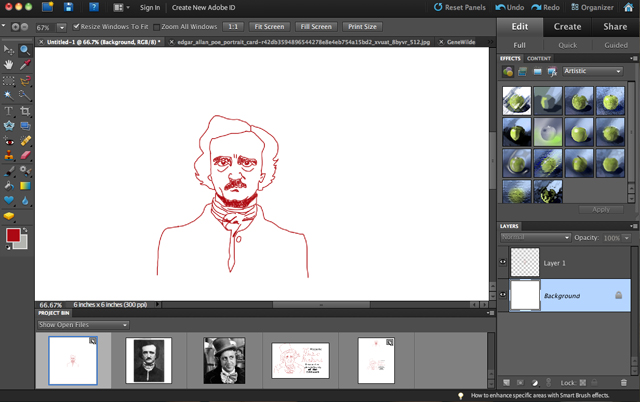
03. Delete the image layer. Print.
04. Layer your drawing on top of the carbon paper, which is on top of the fabric (carbon-side down), and trace all the lines of your drawing with a pen, using enough pressure to transfer the carbon.
05. Embroider over your pattern, taking care not to brush your hand against the carbon pattern too much because it smudges easily.

How to embroider absolutely any image you want
Gonna do some embroidery for the first time in years.


signature color

Friday, July 26, 2013

DI(fr)Yday: Tie-dyed Cutoffs

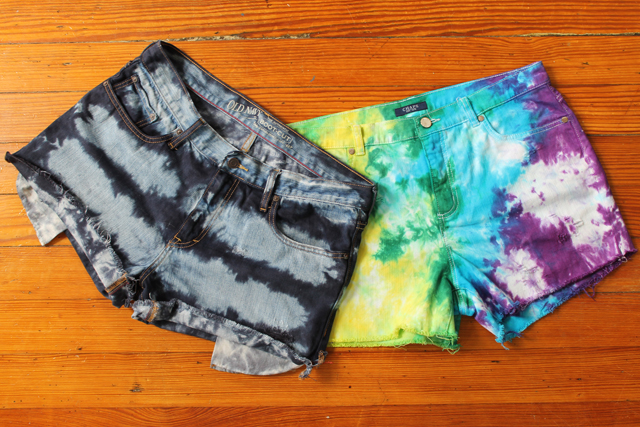
Tie-dyed distress denim shorts cutoffs

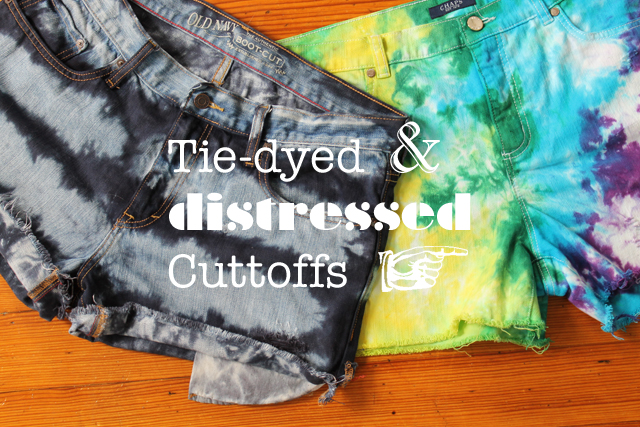
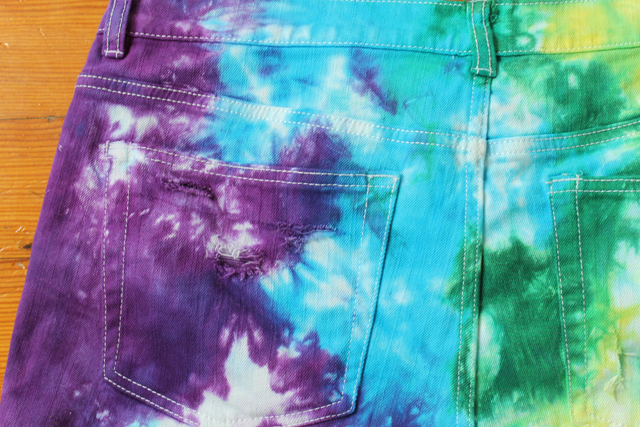
Last weekend, Ryan's parents hosted a tie-dye party. Though never exactly hippies, his parents are very into tie dye. I couldn't decide what I would bring to dye until the night before when I saw some really cute tie-dye cutoffs in the latest issue of Bust Magazine. So, the next morning, before the party, I went thrifting and found two pair of jeans to transform.

Thrifting jeans for cutoffs is much easier than trying to find perfect, thrifted full-legnth jeans because the length doesn't matter and the cut of the leg barely matters. Here, I used a pair of white women's capri-length jeans and a pair of blue men's bootcut jeans. I like to use men's jeans because their pockets are long enough to stick out the bottom of your shorts. But you have the be careful, because mens jeans can have smaller hip-to-thigh ratios. Cut into the seams on the outside of the legs to open up the thighs a bit if you need to.

*     *     *

First, I cut off the legs, leaving a 3.5-inch inseam and angling the cut slightly up toward the sides. Shorts inseams are a personal preference, and, if you're not sure how short you want your cutoffs, I recommend erring on the side of long, trying them on, and then cutting shorter if you need to. Remember to test the length sitting down as well as standing. For me, 3.5 inches is the perfect length to give me enough thigh coverage that I feel comfortable, without looking like mom shorts.

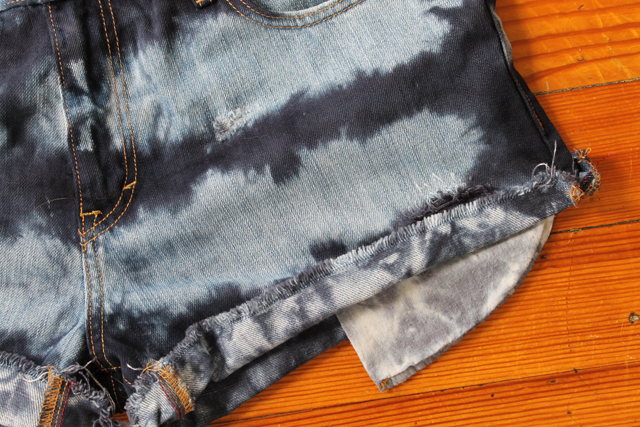
Next came the distressing. Of course, you could just fray the edges and call it a day, but I think a good distressed pair of cutoffs is so much better than a crisp pair. I hadn't distressed jeans since high school, so I gathered a bunch of supplies together: steel wool, sand paper, scissors, a craft knife. While the sand paper was great for loosening up the denim all over, the craft knife turned out to be the most indispensable tool. My friend even discovered a great method for getting those large holes with lots of strings running across: you cut only the vertical threads with the craft knife, little by little, and then use steel wool to open it up so that the uncut horizontal threads have free rein.

Tie-dyed distress denim shorts cutoffs

Finally, it was time to dye. I'm not a tie-dying expert by any means, and I'm sure there are many more informative tutorials online than I could share here. But I will tell you what methods I personally used to get these effects.

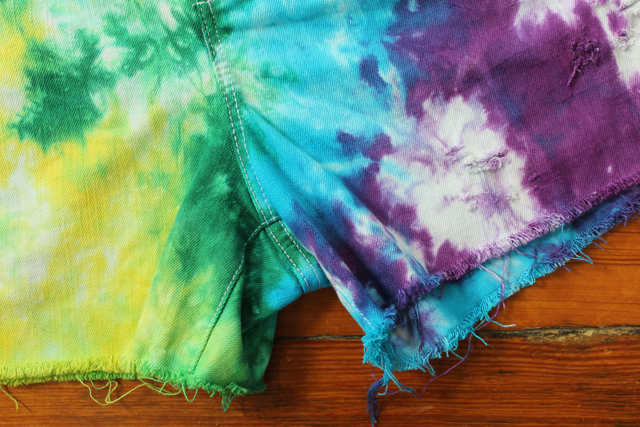
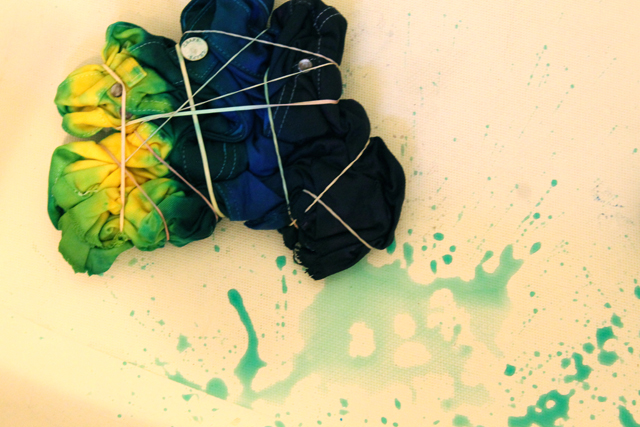
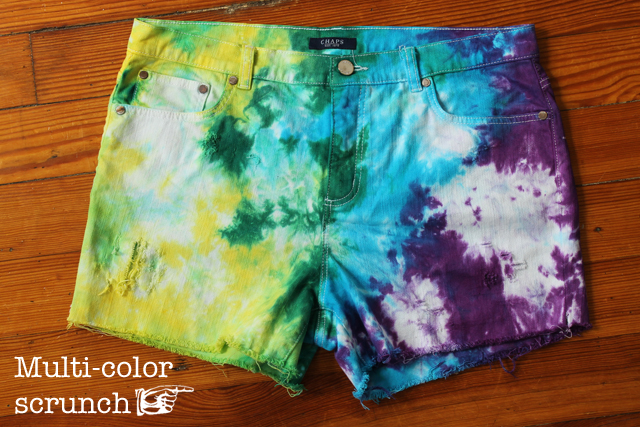
For the white shorts, I used the scrunch method. I then used yellow, green, turquoise, and purple dye in a rainbow pattern from left to right. You could just squirt color everywhere to get a more random effect, but I wanted a progressive rainbow look.

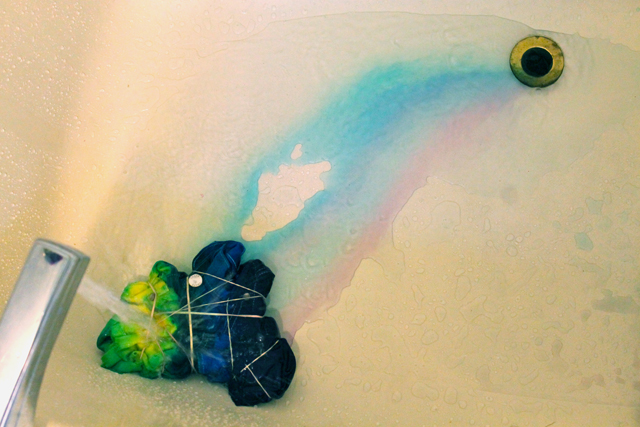
After letting the dye soak in overnight, I rinsed the shorts until the water ran clean, removed the rubber bands and rinsed them some more, and then machine washed them together in hot water to set the dye.

Tie-dyed distress denim shorts cutoffs

For the blue shorts, I used the accordion method and black dye.

Tie-dyed distress denim shorts cutoffs

This was a different project for me, since I haven't tie-dyed or distressed denim in about ten years. But I really love the results. I definitely want to experiment more with dying shorts and other things in the future.

Tie-dyed distress denim shorts cutoffs

signature color

Friday, July 5, 2013

DI(fr)Yday: How to Make Metallic Color-Block Hand-Painted Antlers


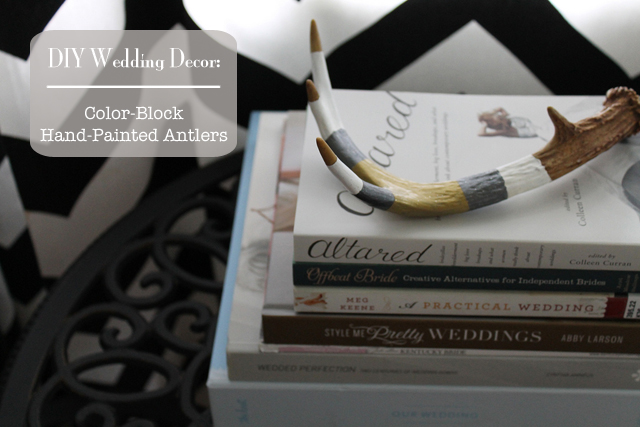
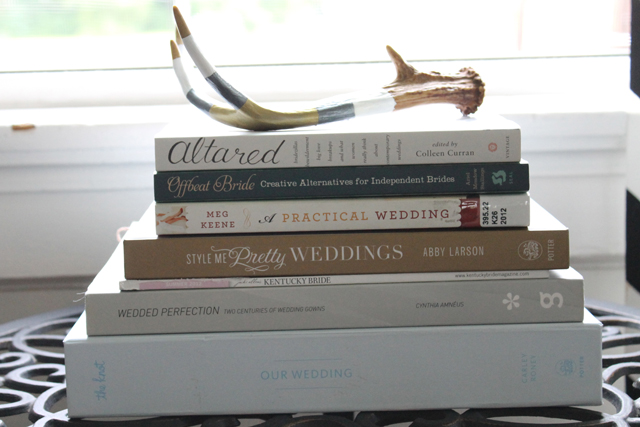
DIY Wedding Decor: Color-Block Hand-Painted Antlers

At our wedding, I'm going to have people sit at one long rectangular table, beer garden style. Instead of classic flower centerpieces, I'm going to have an evergreen garland running the length of the table which will also be strewn with these mason jar votives and hand-painted antlers.

These antlers would make great accent pieces for your home, too. 


I'm having a lot of fun challenging myself to make video tutorials. I hope you like this one. And, if you haven't seen the others yet, they are here and here.

DIY Wedding Decor: Hand-painted color-blocked antler video tutorial

signature color

Friday, June 28, 2013

DI(fr)Yday: How to Make Miu Miu-Inspired Glitter and Suede Shoes


Like everyone else in the blogosphere, I exploded with gushy love over Miu Miu's glitter and suede shoes from the A/W 2011 shows. Since then, I've considered buying a used pair on eBay multiple times, exhaustively searched the Internet for a good knockoff pair, and brainstormed how best to DIY a pair. 

The main  problem with most knockoffs and DIY concepts was that they didn't include the amazing curved heel shape, which is one of my favorite things about the shoes. 

Then, I found this pair from Target, which, though not a direct Miu Miu knockoff, features the curved heel shape I love so much. I decided they would make the perfect base for a DIY.

signature color

Friday, February 22, 2013

DI(fr)Yday: How to make a horizontal-zipper coat

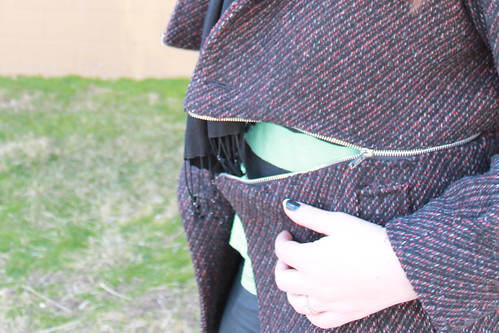
 How to insert a horizontal-zipper into a coat How to insert a horizontal-zipper into a coat

I've been into the horizontal zipper look since I saw Andy Torres and others rocking this coat and this blazer last year, but it only occurred to me recently what a simple and exciting DIY opportunity this would be.

You will need:
1 coat, thrifted or otherwise
2 separating zippers (each long enough to go halfway around the coat)
A sewing machine, needle, thread, pins, good fabric scissors

Step 01. Decide where on your coat you want the zipper to go, and cut the coat in half, taking care to cut a straight line.
02. Position the zippers along the top of the bottom half of the coat with the openings toward the ends and the zipper bottoms flesh together at the center of the coat. Pin in place, sandwiching the zippers between the coat's lining and outer shell as shown, folding over a bit of each salvage edge.
03. Sew along pin lines with the machine, leaving the edges to do by hand.
04. Repeat steps 2 and 3 with the other edge of the zippers and the bottom edge of the top half of the coat.
05. Finish the edges by hand, tucking the excess zipper down between the lining and shell.

How to insert a horizontal-zipper into a coat How to insert a horizontal-zipper into a coat

As you can see, this is a relatively simple way to add a lot a lot of interest to an otherwise unexceptional coat. I hope you have fun making one yourself. Don't forget to send me a link or photo. 

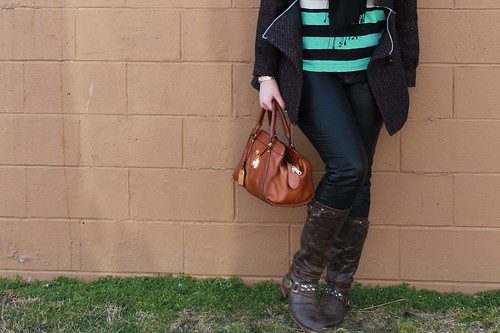
Horizontal outfit: vegan leather pants, brown leather boots, black white and mint striped marinière shirt, black cashmere pashmina, cameo pin, Lauren by Ralph Lauren bag, DIY horizontal-zipper coat

Join me on: facebook // twitter // bloglovin // pinterest // instagram