



Bookish and Belle banner (without tabs) Outfits Recipes Crafts Home Wedding
Showing posts with label how to. Show all posts

Monday, September 2, 2013

6 Tricks for Beautiful Skin in Your 20s and Beyond

6 Tricks for Beautiful Skin in Your 20s and Beyond

Some birthdays pass with no changes, while others seem to announce themselves, ushering in a whole new way of thinking about things as they do. When Ryan turned 30, people kept asking him if he felt any different, and he always responded that overnight he had become interested in investment portfolios.

This year, when I turned 25, I felt the same kind of overnight shift that Ryan had described. Except it wasn't investment portfolios that suddenly grabbed my interest; it was skincare. There are similarities to be found: skin is an investment, and, just like saving for retirement, it's always a good idea to start early.

25 is the first birthday that I've really felt since I turned 18. There's the whole being alive for a quarter of a century thing, and then there's the fact that I can no longer claim to be in my "early 20s." Since turning 25, it's hit me that my youth is slipping away faster than I realized. Although, right now, being young feels like a significant part of my identity, it won't be a part of my identity forever or even for much longer. I will get older, I will learn how to be older, and I will look older.

I don't think looking my age is going to bother me much when the time comes. I fully expect to have fine lines in my 30s and small wrinkles in my 40s. I don't expect to be a wrinkle-free 50 or 60 year old and I don't want to be one.

But I do want to look good for my age.

I think older women with fabulous skin are so beautiful. See: Helen Mirren, Meryl Streep, Diane Keaton, Cate Blanchett, etc. Sure, their faces are lined and their skin isn't as firm as it once was, but it is still smooth and glowing and their gorgeous features are shining through. They are a totally different kind of beautiful than they were in their youth, but no less beautiful.

Now that I'm actually starting to think about the approaching reality of myself as an older women, I want to do everything in my power to be one of the really beautiful and classy ones with great skin and hair, good posture, and effortlessly timeless style.

The fact is that having great skin in your 60s starts in your 20s. You can't just wake up at 65 or even at 45, decide that you're going to start taking care of your skin, and expect to be able to improve it significantly. I don't mean to imply that it's ever to late to make skincare a priority, but, when it come to great skin, prevention is key.

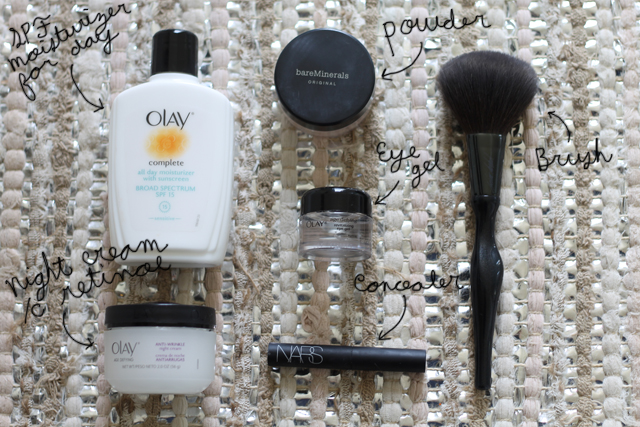
That's why I've decided to get serious about my skin since my birthday. I bought some fancy moisturizer and night cream (just Oil of Olay for now, but I'm open to buying more expensive ones if I become convinced that there's a big difference), and I haven't skipped a day or night since buying them. I even paid $25 each way to check my carry-on-size bag when I flew to Austin so that I could take my moisturizer and sunscreen with me. Man, will I be happy if and when the TSA ever lets us carry on more than a few ounces of liquid again.

I'm excited about my new skincare regime, but fancy products aren't the only preventative measure smart 20-somethings should take. Here are six major things you can do now that will have a big impact on how your skin looks later (as well as your overall health).

01. Don't smoke. Don't use drugs. Consume alcohol in moderation.

It's hard to overstate the damage these poisons do to your skin and your overall health. If you have a problem with smoking, drugs, or alcohol, you don't need me to tell you how important it is to quit or how difficult it can be, and I almost feel silly bringing up the damage these substances can do to your skin, since it's really the least of their consequences. Still, I can't see giving out preventative skincare advice without starting at the beginning. First, do no harm.

02. Stay hydrated.

You probably know all about the obvious connection between hydration and great skin. In fact, dehydration is the main negative affect that alcohol has on your skin. So, if you are going to enjoy a night of heavy drinking, make sure to end the night with a few tall glasses of water. Not only will your head thank you in the morning, your skin will too.

It goes without saying that you should also make hydration a priority during exercise and in very hot weather. As for the advice about drinking 8-ounces of water a day. That number is pretty random; the truth is that everyone needs a different amount and that circumstances change the amount you need from day to day. Listen to your body, and drink water when she tells you that she needs it (and when you drink alcohol).

03. Moisturize, moisturize, and then moisturize some more. 

Washing your faces strips your skin of moisturizing oils, and dry weather can be really hard on the skin too. You should moisturize at least twice a day. Use a moisturizer with SPF (tinted if you like) in the morning and a night cream at night. I use a night cream with retinol in it because retinol has been shown to increase the skin's collagen production, keeping it firmer for longer. Remember, twice is the minimum number of times you should be moisturizing each day. It's also important to moisturize after washing your face, after swimming, and anytime your skin feels dry or itchy. And don't forget your neck!

6 Tricks for Beautiful Skin in Your 20s and Beyond

04. Get plenty of sleep.

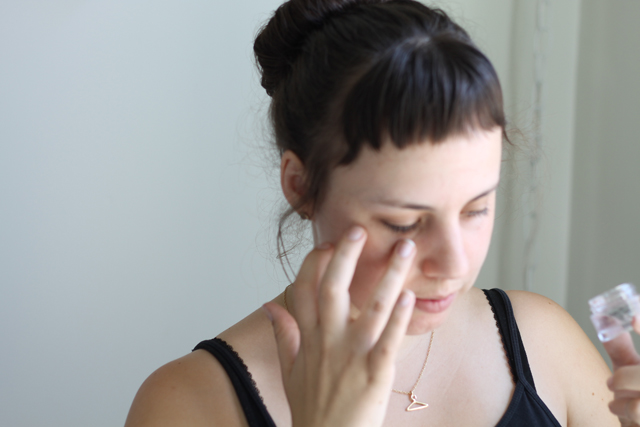
Sleep is so important for every element of your health from maintaining a healthy weight to decreasing stress, and your skin's lusciousness is no exception. I have hereditary dark circles that show up no matter how much sleep I get, but they definitely look worse when I get less sleep. I've been trying out an eye treatment at night to reduce puffiness, though it hasn't done much for my circles.

Your eyes aren't the only things that suffers from lack of sleep. When I don't sleep enough, my skin looks duller and more sallow. I know that prioritizing sleep can be really hard, and it's definitely not something I've mastered yet, but it's on my list of things to focus on to support my skin and my overall health.
6 Tricks for Beautiful Skin in Your 20s and Beyond

05. Just say no to sun damage.

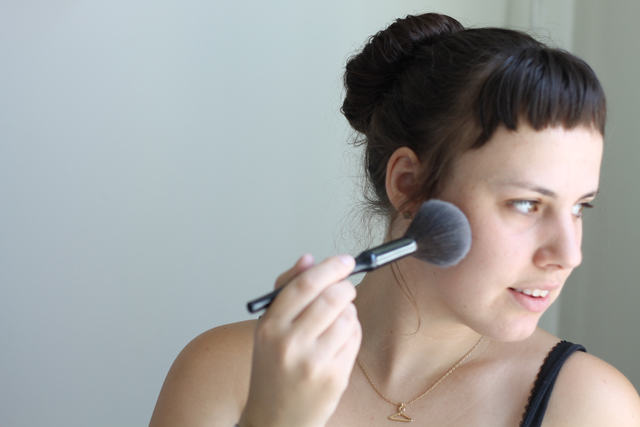
Preventing sun damage goes beyond simply wearing sunscreen, seeking shade, and (for God's sake) saying no to tanning beds and "laying out." In addition to these core habits, you need to wear moisturizer and/or makeup with SPF every single day. Yes, even in winter. Yes, even on cloudy days. Just make it a habit, and never leave home unprotected again.

And don't forget about sunglasses! I once heard from an older Parisian that the French have an edge on Americans because French women know the importance of sunglasses. Not only do sunglasses keep the sun from damaging your eyes, they also keep it from damaging the skin around your eyes! It seems obvious when you think about it, but I don't think most women do think about it, or, at least, I never did. Sunglasses are the best way to prevent crow's feet while simultaneously looking glamorous. Sunglasses, pass it on! A little Parisian secret from her to me to you.
6 Tricks for Beautiful Skin in Your 20s and Beyond

06. Keep makeup minimal. 
This is another thing the French are doing right. Because they prioritize skincare (most French women get regular facials), the French like to let their skin show, rather than covering it with tons of makeup. Makeup clogs pores and hides your gorgeous skin. Plus removing a thick coat of makeup every night is really hard on the skin. Personally, I just wear a bit of concealer set with Bare Minerals powder. In the past, I've worn tinted moisturizer as well. I also wear a bit of blush most days (gel in the winter, powder in the summer). If you can muster the courage to give up thick foundation, I really recommend it. It might be hard for a while, while your skin is still clearing up. But soon, your skin will look better overall and you'll be proud to show it off.
6 Tricks for Beautiful Skin in Your 20s and Beyond

signature color

Friday, April 12, 2013

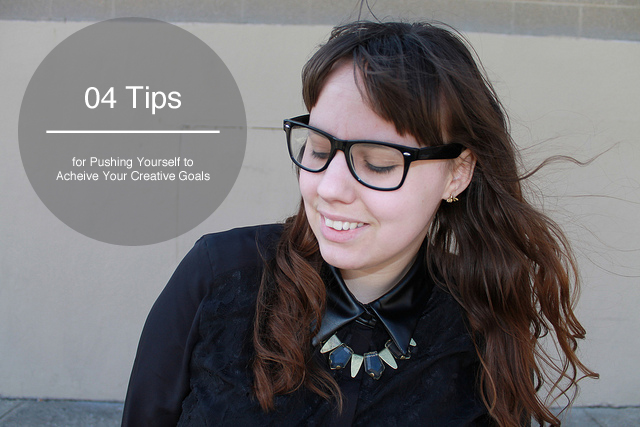
4 Tips for Pushing Yourself to Achieve Your Creative Goals

4 Tips for Pushing Yourself to Acheive Your Creative Goals

Back in June, I made a list of 24 birthday goals to work on before turning 25 (this June). Two of those goals related to blogging: "Create a better blog banner" and "More video blogging." My desire to have a better banner soon gave way to an overall feeling that the visual style of my blog needed some updating, some cleaning up, and some major beautification.

Since I know very little about either html or graphic design (and don't have much money to pay a professional), this goal sat on the back burner for a while. Each day it bothered me more and more that my blog's look didn't match the quality or style of my content.

I began to suspect that its amateurish design was holding me back from impressing possible future sponsors and affiliates as well as misinforming new readers about my level of commitment and the quality of my content.

Finally, I decided that something had to be done. Even though I felt ill-equipped to take on the project all by myself, I decided that I simply had to push myself to do just that. After reading some success stories from the Blog (Design) Love E-Course, I psyched myself up and took the plunge.

The price-sticker on the course was a lot less than paying a professional designer would have been. And, even though I knew that I wasn't as good a designer as a professional would be, I also knew that no one else in the world knew my style as well or cared about my blog as much as I did. That had to count for something, I told myself.

Under the incredibly comforting and inspiring guidance of teachers Elsie and Elise, I began to redesign my blog one step at a time, gaining confidence and a clearer image of what I wanted every step of the way.

Tilt-shift photography technique

Meanwhile, I was pushing myself creatively in another field: photography. I've surprised myself in the last couple years by falling more and more deeply in love with an art form I initially took up as nothing more than a means to an end.

I bought my first DSLR in the spring of 2011 because I wanted to improve the quality of my outfit photos. I had no idea that, by reading up on photography in an effort to push myself to be worthy of such a nice camera, I would soon discover a love and a talent for creating unique photographic images.

I owe a lot to photographer Kevin Meredith, whose books are profoundly inspiring and hugely informative, while managing to never overwhelm or intimidate me.

So, at about the same time as I was pushing myself to create a new blog design, I also took a new, exciting, and somewhat scary step in my photography: I decided to start building up a portfolio in the hopes of turning it into a side business. This meant soliciting clients, doing actual "shoots," and having the confidence to believe that my work was legitimate.

Both the blog design and the photography also meant pushing myself to learn an entirely new skill: Photoshop. I'd played around with it in the past, but it was time to get serious.

The convergence of all these events, made the last couple of months a particularly interesting time in my creative life. It was a tangle of projects and ideas that created equal parts stress, fear, pride, and inspiration.

In the last five or six weeks I've shot head shots for two actresses (one an old friend, one a stranger), experimented with free lensing technique, played around with building a photography website, learned a lot more photoshop, learned more html, designed and launched a new look for my blog, and created my first edited video blog post.

And while I'm proud of all the specific skills I've learned lately, my biggest take-away lesson is this:

Challenging yourself, setting goals, pushing yourself out of your comfort zone . . .  these are the ways to reach that magic place where you've achieved something you can be proud of. 

And the happiness that magic place brings is so much bigger than the fear you have to face when you take that first big step.

*     *     * 

Along with that big message, I want to share a few tips that I've learned in my own efforts to push myself creatively and go after my creative goals. I hope they'll help you in your own creative endeavors!

4 Tips for Pushing Yourself to Acheive Your Creative Goals

Maybe you're a baker, and you think that what you're supposed to want is to open your own bakery. But really, you just want to sell cookies at a local shop, or to start a catering company, or to write a cookbook, or to launch a baking blog.

Or maybe you're a comedian, and everyone expects you to want to host a talk show. But really, you want to write for a talk show, or you want to do improv, or you want to start a podcast, or you just want to be a road comic.

You get the idea. There are lots of different dreams. Don't let anyone tell you what your dream should be. Only you know what it really is, and only you know the goals to set to get yourself there.

4 Tips for Pushing Yourself to Acheive Your Creative Goals

Announcing your goals, even if you just have the courage to confide in one person, helps make them real, and helps hold you accountable.

When I decided that I wanted to build toward making photography an actual profession, I was afraid to even tell my fiancé Ryan about it. What if he thought I was being unrealistic? Could I ever succeed at something if he didn't believe in me?

But once I bit the bullet and said it out loud and saw that people didn't laugh at me or think I was being unrealistic, the whole thing suddenly felt a bit more achievable.

4 Tips for Pushing Yourself to Acheive Your Creative Goals

There will always be a point where pushing yourself really isn't fun anymore. This is the point where a lot of people give up.

The secret is to have faith that the hard part won't be forever, and that the reward will make all your hard work worth it. It's always ok to take a break, but remember that there will be hard parts and nothing can make them go away except pushing through them.

4 Tips for Pushing Yourself to Acheive Your Creative Goals

Just remember to come back.

I have trouble following this advice myself. When I get obsessed with something, I can not put it down. I've been known the hunch over a sewing project until my back is so soar I can't see straight. I've been know to get so caught up in a project that I forget to eat all day long. Suddenly it's 10 p.m. and I'm cranky and exhausted and my stomach hurts! I've also been known to ignore a full bladder for hours, holding it like I'm on a road trip because I just keep telling myself, "just do this next thing and then you can use the bathroom."

This kind of behavior is not healthy and, as you can imagine, it doesn't lead to the most enjoyable creative experience. I don't expect most people have a much trouble walking away from a problem as I do. But it's still good for everyone to remember that sometimes it's good to take a break.

Often, it's only when you take your mind off the problem and allow your brain to focus on something else, that your subconscious is able to find the answer you were looking for, leading to that coveted eureka moment.


signature color

Monday, April 1, 2013

Recipe video: How to make a whole fruit green smoothie

One of my birthday goals this year was to do more video blogging in a serious and artful way. I've done some simple all-in-one-take videos in the past, but I don't want to do any more of those. They feel lazy and they don't stretch my creativity of give me a chance to learn new skills.

I've been thinking about what kinds of subjects might make good videos for the blog, and taking inspiration from really beautifully filmed tutorials like this recipe one (truly a work of art!) and this DIY one (shows so much personality!)

When I saw this skincare advice video made by fellow blogger Alexandra of To Vogue or Bust and read what she shared about wanting to do more video blogging but being a bit scared (a sentiment I echo wholeheartedly), it really gave me the kick in the pants I needed to just take the first step.

Even if my first videos weren't perfect, I would learn along the way, just like I've learned (and continue to learn) everything else I know about blogging. 

So here's my first step. I hope you enjoy it! Feedback is always appreciated. Thanks, loves!


signature color

Monday, March 25, 2013

Beauty Tutorial: How to give yourself a caviar manicure

How to do a caviar manicure

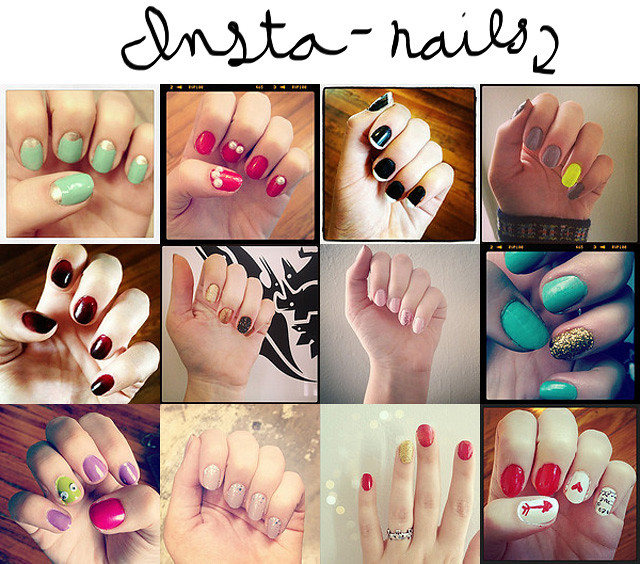
If you follow me on Instagram, you are, no doubt, well aware of my love for nail art. I like to do my own nails (it's a nice ritual and a good way to take a little "me time"), and I love trying out new trends.

Instagrammed nails

Some of my favorite recent nail trends include ombré, neon, oxblood, half-moon reverse French, and matte. 

Lately, however, I've been interested in pushing the envelope a bit further and experimenting with 3D nail art. Last Halloween, I glued googly eyes to my nails (but they didn't last long) and, for a costume party, I tried glueing scrapbooking pearls to them with pretty awesome results. 

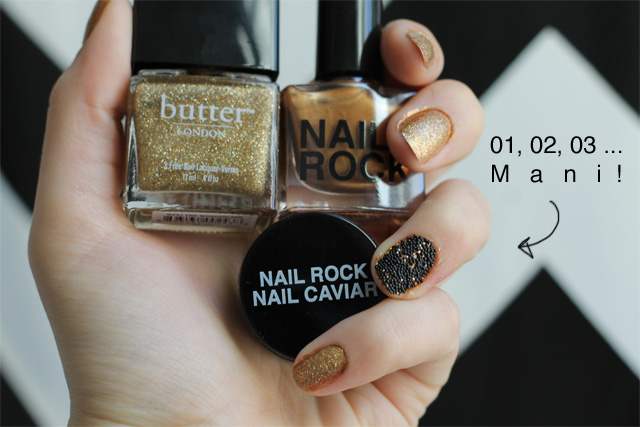
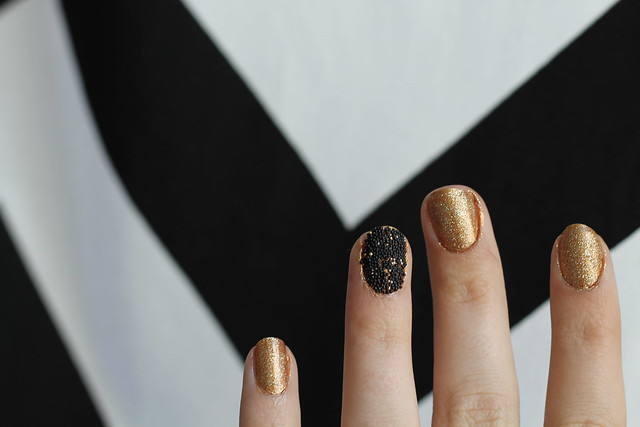
So, it was only a matter of time before I decided to test drive a caviar-nails kit. The one I bought is called "Nail Rock"and is available at Urban Outfitters for $8.00, but I think you could probably use seed beads, and I'm even considering trying to do it with candy sprinkles. 

Here's how you get the look . . . 

How to do a caviar manicure

01. Paint nails with two coats of polish. Before the second coat dries, dip focus nail into caviar beads.
02. Lightly press beads into polish, brushing away excess. You'll want to do this on a smooth surface to simplify cleanup. 
03. Pain remaining nails with a layer of glitter polish. Let dry. 
04. Seal all nails with a clear topcoat. Let dry for a good 20-30 minutes. 

signature color

Friday, March 15, 2013

How to rock the mismatched earrings trend

Mismatched earrings trend

I've mentioned before my recent penchant for wearing mismatched earrings. As a near-exclusive wearer of studs, I find it to be a nice way to add a bit of subtle interest to your look. It's one of those things that a friend won't notice or mention until a good two hours into a hangout session (and many won't notice at all), but, in my experience, it never fails to elicit the "what a great idea!" response.

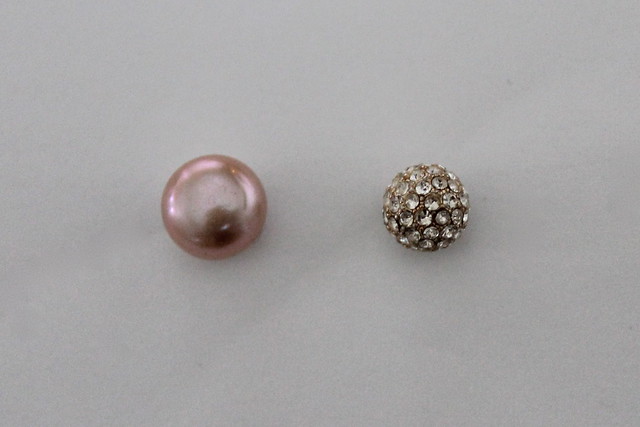
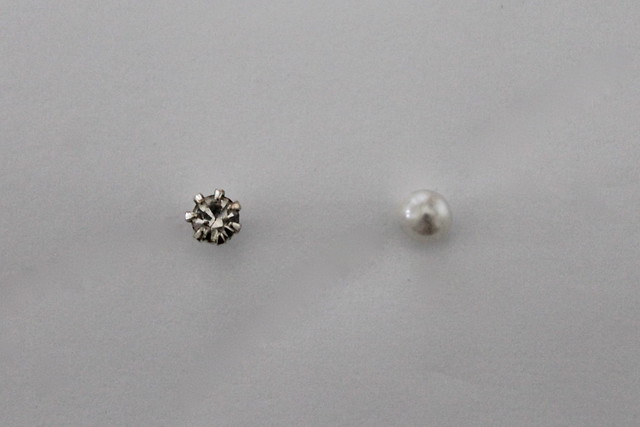
In addition to being a great way to avoid the choice between two awesome pairs of earrings, wearing mismatched studs is also a great way to extend the life of earrings long after loosing their mates. In fact, in the case of the plain-white-peal stud and rhinestone stud seen below, both are earrings I found, never laying eyes on their mates to begin with.

Mismatched earrings trend

Some of you -- those who love wearing mismatched socks for instance -- probably need no cajoling at this point to mixup your earring drawer and never look back; you might even be excited to try out a more obvious look such a mismatched danglies. 

But, for those of you wondering where to begin and how to keep this trend looking . . . well, intentional . . . I have a few tips to keep in mind. 

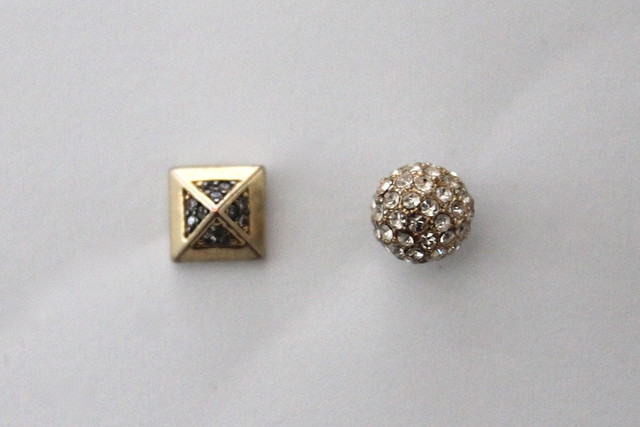
The first is that the studs you pick should be relatively similar in size. For example the pavé ball and pyramid above are both about 1/4" in diameter, while the pearl and rhinestone above come in at about 1/8".  In this way, the amount of earlobe showing stays the same on both sides, giving your face an overall appearance of symmetry. 

Another tip is that you should have fun playing with contrasts, which is, after all, the point. In my opinion, the best pairings have just enough similarities (including size) that they work together, but just enough contrast to add visual interest.

For example, in the first photo, both earrings are pavé (a nod to uniformity) but their shape is vastly different: one a smooth sphere, the other all edges and angles. 

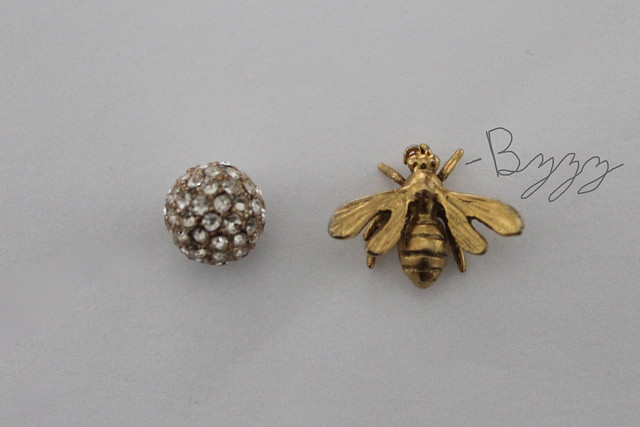
In the paring below, the shapes are also vastly different, but the uniform gold color lends a hint of similarity.

Mismatched earrings trend

And here, both earring share a circular shape but differ vastly on their surfaces, one being a sparkly, encrusted pavé, the other pearly smooth. 

Mismatched earrings trend

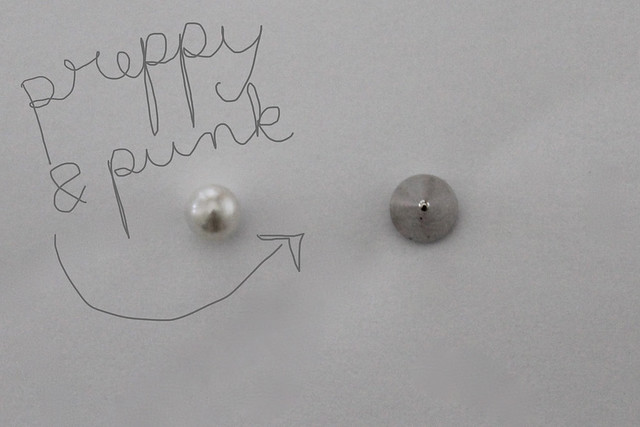
Finally, I love the idea of clashing the essential attitudes of each earring. Much as I enjoy toughening up a girly dress with a leather biker jacket, the idea of pairing a classically preppy pearl stud with a punky spike is endlessly appealing to me.

Mismatched earrings trend

I hope you have as much fun as I did finding surprising pairings in your jewelry box. And I hope my tips are helpful to those of you that might be a bit tentative when embracing this trend. Vive la mismatch!

Pavé pyramid, pavé ball, golden bee - Anthropologie
Pink pearl - a gift
White pearl, rhinestone - found
Circular spike - Tobi (though not a site I'd recommend) 

signature color

Friday, January 4, 2013

DI(fr)Yday: How to make a studded trasparent clutch

DIY studded transparant clutch

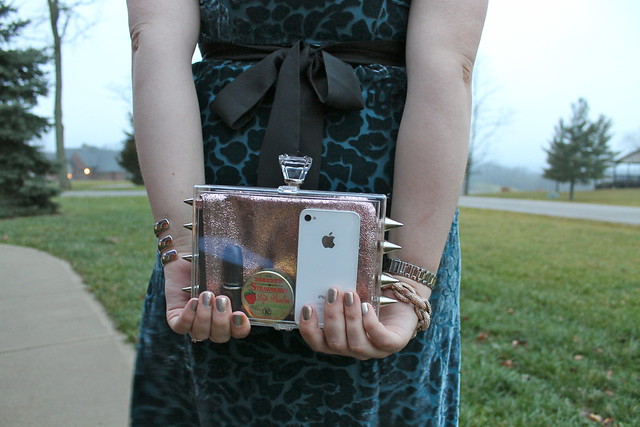
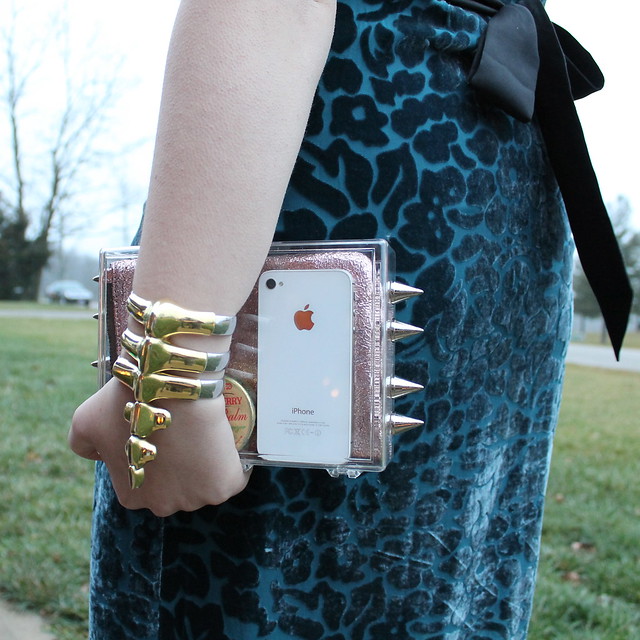
I've been wanting to try Honestly...WTF's transparent-clutch tutorial for a while now. It's not complicated, but it involves drilling into plastic, which takes a lot of patience. You have to be really gentle. It feels like the drill will never break through and you'll want to apply more pressure, but you don't want to crack the plastic. 

I kicked my clutch up a notch by adding screw-in studs like these to the sides. (I used leftovers from the frenemy bracelet.) All I had to do was screw additional holes into the sides of the box. Admittedly, this made the DIY 9-times more complicated (drilling 9 holes instead of 1), but I really like the dainty-meets-tough-girl look that it achieved. 

DIY studded transparant clutch

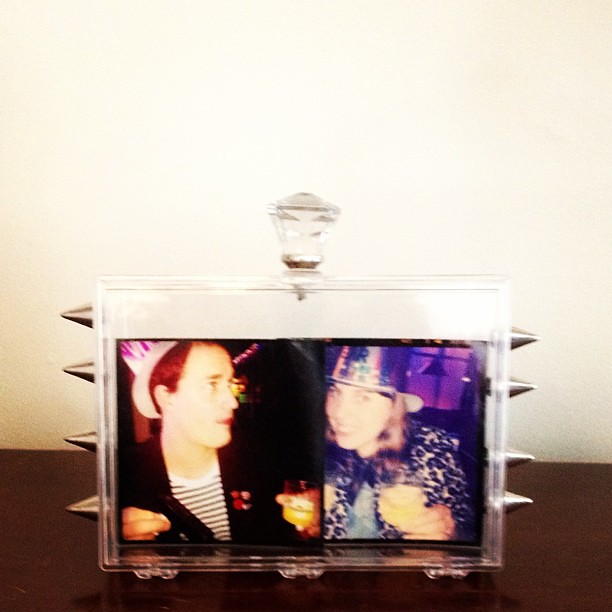
When my new clutch isn't going for a night on the town, it lives on our dresser where it displays Instagram prints. 

Made this sick clutch yesterday. It's displaying our New Year's pics for the time being. Gonna have its coming out soon. #diy #studs #clear #decoration #fmsphotoaday


Join me on: facebook // twitter // bloglovin // pinterest // instagram

Monday, October 22, 2012

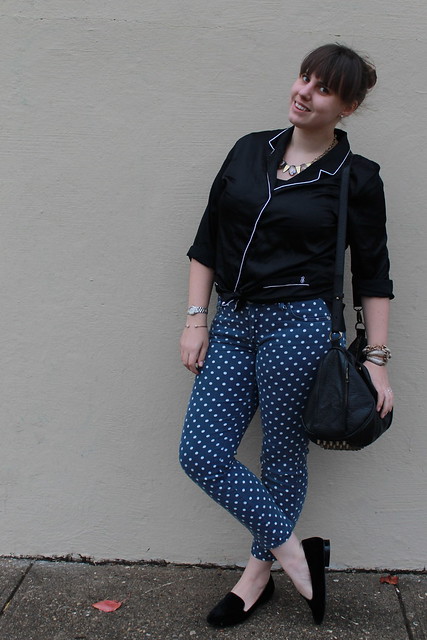
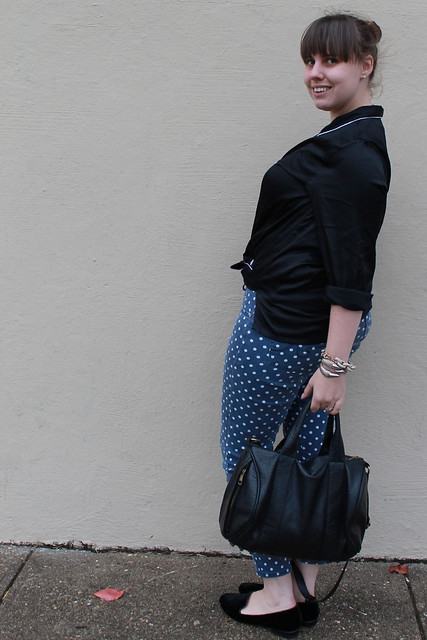
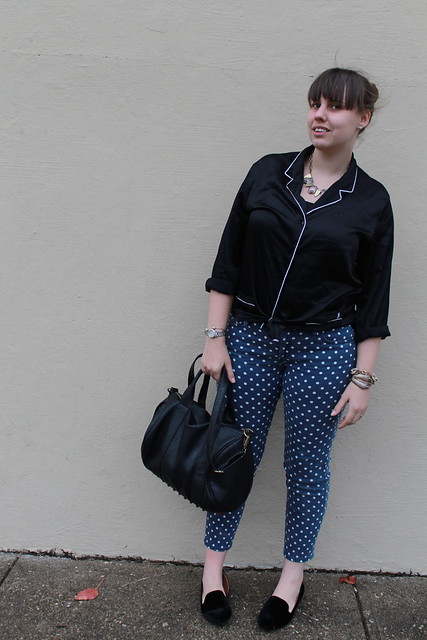
What I wore today: 10/19/2012 (Pajama Game)

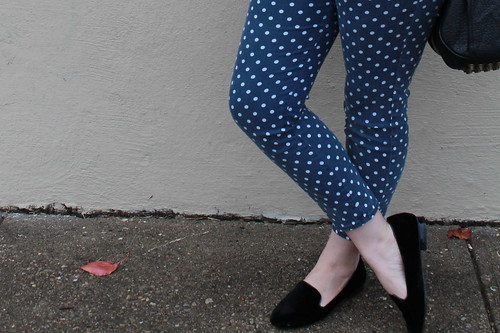
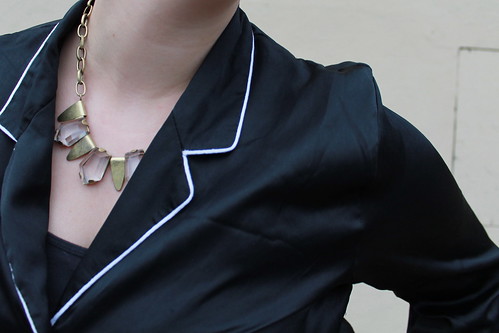
PJ Top Outfit: Victoria's Secret pajama top, polkadot AG jeans, black velvet loafers, studded-bottom bag

My tips for making the pajama-top-as-daywear trend look chic, not sloppy:

01. Pick a solid color or a simple pattern like stripes rather that a kooky pattern that's obviously designed for sleepwear.

02. Roll up the sleeves and tie the front or tuck it in. These little touches give the top a new shape and make you look pulled together, and not as if you just rolled out of bed.

03. Add jewelry. Like rolling your sleeves, or tying the front of your top, adding jewelry gives your look an air of thoughtfulness, which helps your outfit read "intentionally trying out a fun trend" rather than "slept through my alarm this morning."

04. Have fun with it. I paired my pajama top with velvet loafers that hint at the idea of smoking slippers. I don't want to look like I rolled out of bed, but I do want to take advantage of the glamourous, loungey feeling that my satin pajama top is bringing to the outfit party. After all, if I just wanted to look like I was wearing a plain top, I could just wear a plain top. But, as I'm wearing PJs, why not wink a bit and let my outfit have a sense of humor.  

Full disclosure: trying out new trends can be scary. I offer these tips in the hope that they can assuage some of your fears if you've been drawn to this trend but haven't had the confidence to take the plunge yet because you worried you might not be able to "pull it off." However, don't think that my giving advice means that I am in any way immune to the same insecurities as you. I wore this outfit to work and I was really nervous about it. Once I got to work, however, I got three compliments: two from people who realized it was a pajama top and one from someone who didn't. Their kind words reassured me.

Sometimes fashion is fun, and sometimes it's scary . . . and sometimes, like the best things in life (roller coasters, falling in love), it's a little of both. 

PJ Top Outfit: Victoria's Secret pajama top, polkadot AG jeans, black velvet loafers, studded-bottom bag

Satin pajama top - Victoria's secret
Polka-dot jeans - AG, Anthropologie
Velvet loafers - Urban Outfitters
Studded-bottom bag - eBay
Necklace - J.Crew Factory
Bracelets - Anthropologie, Asos, J.Crew
Diamond watch - Citizen

Join me on: facebook // twitter // bloglovin // pinterest // instagram

Friday, September 7, 2012

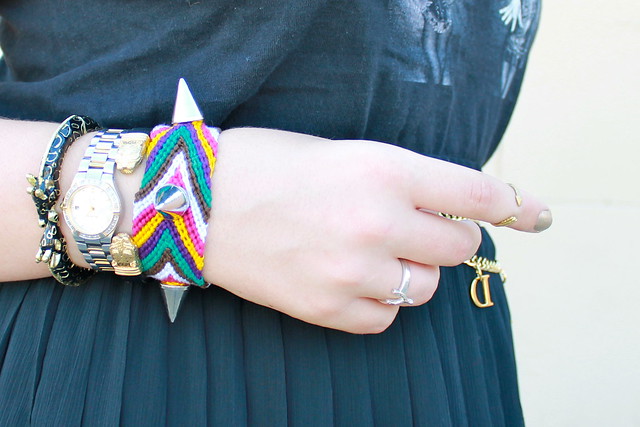
DI(fr)Yday: How to make a spike studded friendship bracelet (AKA: "frenemy bracelet")

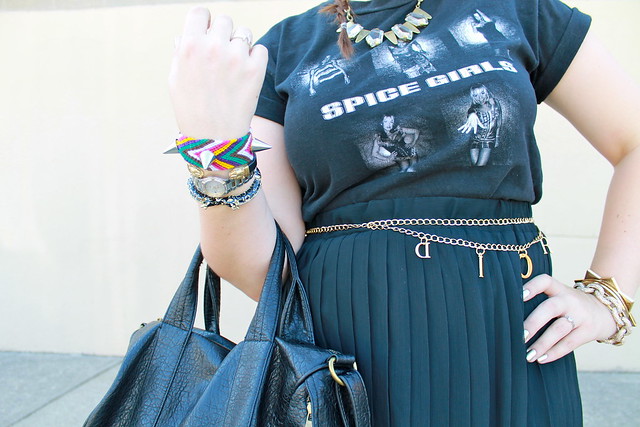
Black and gold outfit: Vintage Spice Girls t-shirt, high-low-hem pleated sheer skirt, Dior letter charm chain belt, jeweled leopard sandals, studded-bottom bag, studded friendship bracelet, etc.

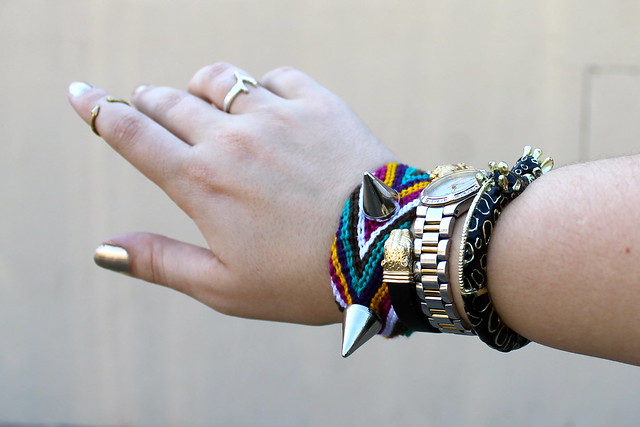
I've been wanting to make a studded friendship bracelet for a long time, but I didn't want to use just any old studs, I wanted some serious spikes. So, I ordered some online and got to work.

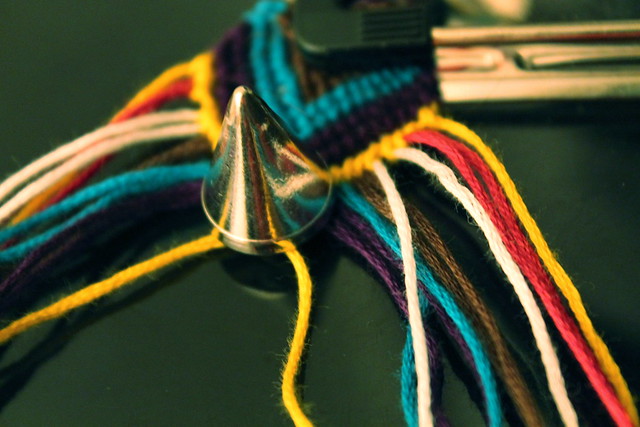
Since I was using screw-back spikes, I wove the bracelet around the spikes and then tightened them with a screw driver when I finished. But if you're using traditional studs (like these for example), you can weave the bracelet and add the studs after. 

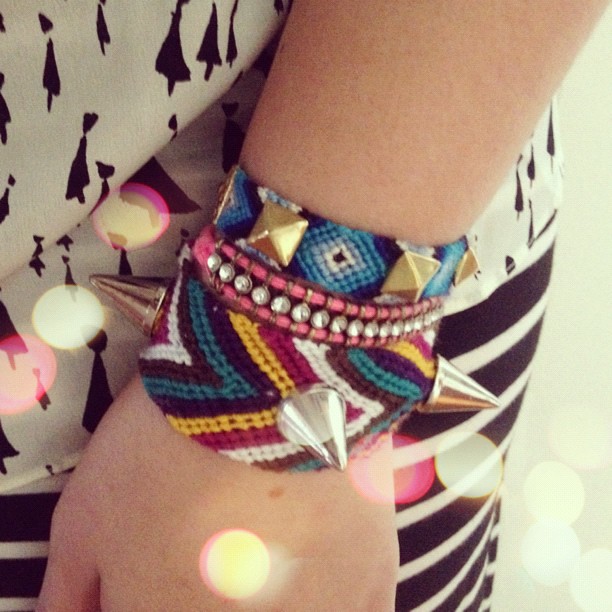
I do, however, highly recommend the high-impact look of some serious spikes like these ones. The final product is a friendship bracelet with edge. As such, I've taken to calling it my "frenemy bracelet."

Black and gold outfit: Vintage Spice Girls t-shirt, high-low-hem pleated sheer skirt, Dior letter charm chain belt, jeweled leopard sandals, studded-bottom bag, studded friendship bracelet, etc.

To balance out the large spikes, I made my bracelet about twice as wide as a normally would. The method is just a traditional chevron weave (you can find lots of tutorials on youtube if you don't remember from high school) but I used two doubled over lengths of each color. 

Here's how you can make your own . . .

01. Measure two lengths of six colors of embroidery floss. Each length should be as long as your arm from shoulder to fingertip. I chose a mix of colors that I thought would be good for fall. But, if you want to use fewer colors, just use more lengths of floss. Double over the floss and tie a knot. Secure it by taping it down to a table or gripping with a clipboard. 

02. Organize the floss so that you have from left to right: 
two strands of color 1, two strands of color 2, two strands of color 3, two strands of color 4, two strands of color 5, four strands of color 6, two strands of color 5, two strands of color 4, two strands of color 3, two strands of color 2, two strands of color 1.

How to make a spikey studded friendship bracelet (or "frenemy bracelet")

03. Begin to weave a chevron design. As I said, youtube has lots of tutorials for this part. Video will give you a better idea of how to do it than I ever could with photos. 

04. When you've completed stripes of 4 colors, add a spike and continue weaving, making sure to know the next row of floss tight around the spike. In another six stripes (between the same two colors as your last spike), add another spike. Add a third another six stripes on, and end your bracelet a few stripes after that at your desired length. 

How to make a spikey studded friendship bracelet (or "frenemy bracelet")

05. Finish the bracelet by braiding the remaining floss into two braids, knotting and trimming it, and tightening the spikes with a screwdriver. 

How to make a spikey studded friendship bracelet (or "frenemy bracelet")

07. Wear your frenemy bracelet with pride! You just DIYed a one-of-a-kind statement piece!

Today's stack - #armparty #diy

Join me on: facebook // twitter // bloglovin // pinterest // instagram

Friday, July 13, 2012

DI(fr)Yday: How to make an ombré rhinestone necklace, bracelet, and earrings

Blue Monday outfit: "Flocked Cobalt Dress" from Anthropologie, Dolce Vita sandals, DIY ombré bracelet and necklace, J.Crew pavé cable bracelet, etc.

A lot of disparate inspiration sources lead me to come up with this project, which turned out to be something uniquely my own that I really enjoy wearing a lot. 

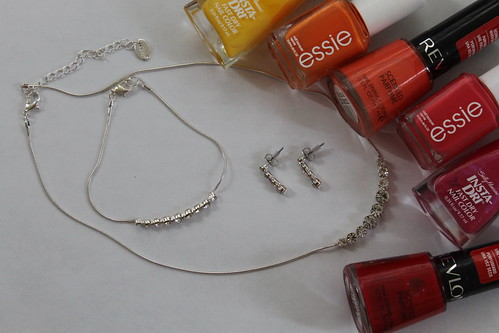
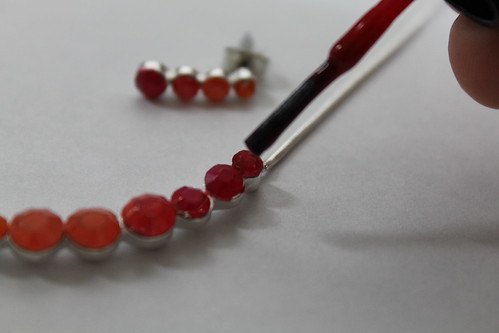
I wanted to paint a rhinestone necklace with neon polish as I've seen countless other bloggers do ever since Tom Binns launched the neon necklace collection heard round the world. So, I stepped into Claire's on my lunch break last week to pick up something cheap that I could paint. While there, I found this simple necklace, bracelet, and earring set, and decided to paint it with an ombré effect.

(I'm still doing the neon one; stayed tuned for it - probably next Friday).

I've been a bit obsessed the idea of a fading orangey sunset ombré since I saw Emily Schuman play with the effect on her nails (here). I did my own version with a larger color scheme that included yellow and deep pink (here). Since Miss Schuman also knocked my socks off (as she is so often want to do) with a pretty ombré necklace (here), I figured why not combine the two ideas, but instead of beads on wire, I would use the very nail polish shades I'd used for my manicure to transform the pretty Claire's necklace I'd so luckily stumbled upon.

IMG_5739Blue Monday outfit: "Flocked Cobalt Dress" from Anthropologie, Dolce Vita sandals, DIY ombré bracelet and necklace, J.Crew pavé cable bracelet, etc.

This is all my longwinded way of attempting to give credit where credit is do. My ideas (especially for DIY projects) often play off the ideas of other people, sometimes coming very close to what they did and other times branching off far away. Sometimes a number of ideas collide as they did with this project, and other times I come up with a project and I'm not even sure how the idea came to me at all.

Pinterest makes tracking my inspirations and giving credit to those who inspire me easier than it would be otherwise, and for that I'm grateful. But I wanted to take a moment here to just say that I have a huge amount of respect for my fellow bloggers and creative crafties, and that stating my inspiration sources and linking with love is something I believe in and something I'm committed to.

So, let's get on with the project already!

How to make an ombré rhinestone necklace

Basically all you have to do is paint each stone with your desired color. In my case, there were more stones on the bracelet and necklace than I had shades, so a few stones got painted the same color. The earrings, on the other hand, had far fewer stones that I had colors, so a few colors were left out. 

As you're planning your design, try to flow with it, allowing the idea of ombré to guide you and taking care not to get too bogged down in making it perfect. As long as each color blends into the next, you'll get the effect you're after.

After painting each stone, use a cotton swab dipped in nail-polish remover to clean up any mistakes. Then, once your polish has dried, seal your work with a clear top coat. 

How to make an ombré rhinestone necklace
Blue Monday outfit: "Flocked Cobalt Dress" from Anthropologie, Dolce Vita sandals, DIY ombré bracelet and necklace, J.Crew pavé cable bracelet, etc.

Join me on: facebook // twitter // bloglovin // pinterest // instagram