


I've been wanting to make a studded friendship bracelet for a long time, but I didn't want to use just any old studs, I wanted some serious spikes. So, I ordered some online and got to work.
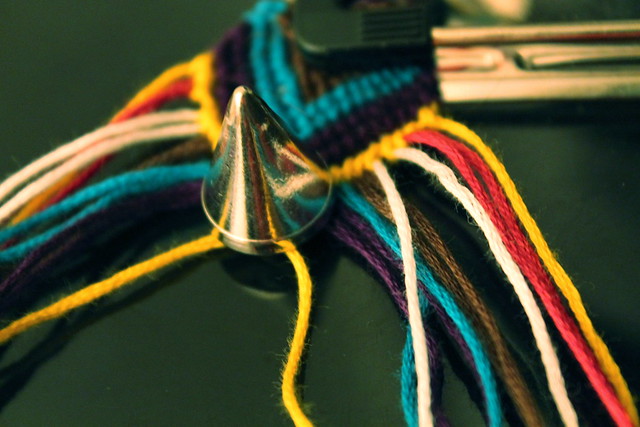
Since I was using screw-back spikes, I wove the bracelet around the spikes and then tightened them with a screw driver when I finished. But if you're using traditional studs (like these for example), you can weave the bracelet and add the studs after.
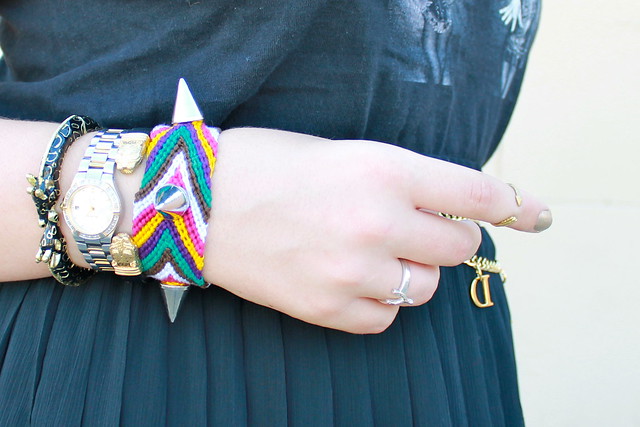
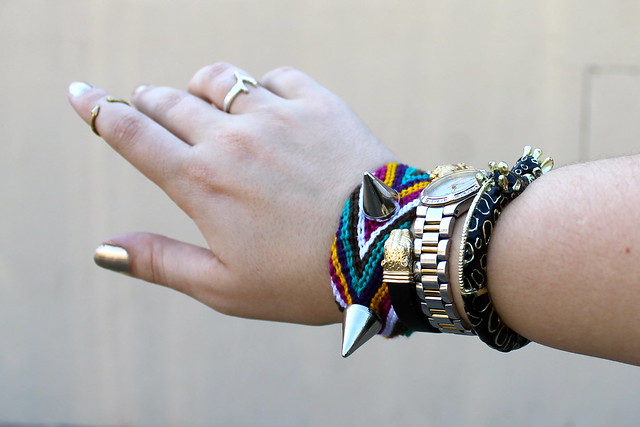
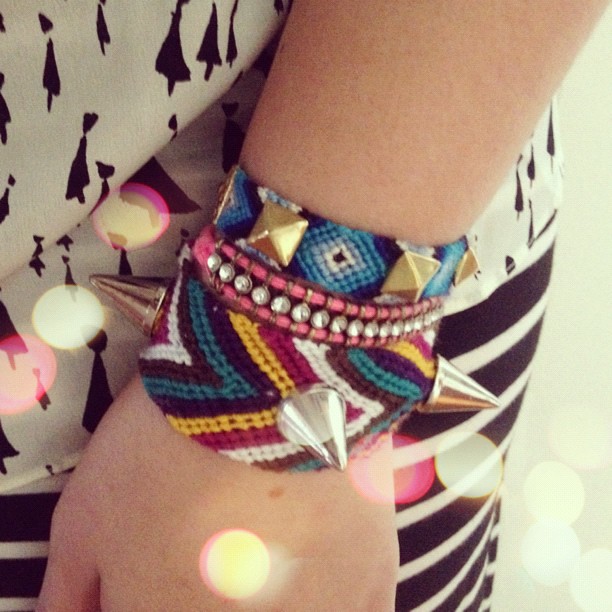
I do, however, highly recommend the high-impact look of some serious spikes like these ones. The final product is a friendship bracelet with edge. As such, I've taken to calling it my "frenemy bracelet."

To balance out the large spikes, I made my bracelet about twice as wide as a normally would. The method is just a traditional chevron weave (you can find lots of tutorials on youtube if you don't remember from high school) but I used two doubled over lengths of each color.
Here's how you can make your own . . .
01. Measure two lengths of six colors of embroidery floss. Each length should be as long as your arm from shoulder to fingertip. I chose a mix of colors that I thought would be good for fall. But, if you want to use fewer colors, just use more lengths of floss. Double over the floss and tie a knot. Secure it by taping it down to a table or gripping with a clipboard.
02. Organize the floss so that you have from left to right:
two strands of color 1, two strands of color 2, two strands of color 3, two strands of color 4, two strands of color 5, four strands of color 6, two strands of color 5, two strands of color 4, two strands of color 3, two strands of color 2, two strands of color 1.

03. Begin to weave a chevron design. As I said, youtube has lots of tutorials for this part. Video will give you a better idea of how to do it than I ever could with photos.
04. When you've completed stripes of 4 colors, add a spike and continue weaving, making sure to know the next row of floss tight around the spike. In another six stripes (between the same two colors as your last spike), add another spike. Add a third another six stripes on, and end your bracelet a few stripes after that at your desired length.

05. Finish the bracelet by braiding the remaining floss into two braids, knotting and trimming it, and tightening the spikes with a screwdriver.

07. Wear your frenemy bracelet with pride! You just DIYed a one-of-a-kind statement piece!
Join me on: facebook // twitter // bloglovin // pinterest // instagram
This is such a cool DIY! I love it! :) It looks amazing, I honestly don't think I could make this! I am pretty horrible at crafts, but it is so pretty I want to try!
ReplyDeleteThanks. Let me know how it turns out if you try it.
DeleteWow, great project! Deffs gonna try it out!
ReplyDeletewww.moiminnie.blogspot.com
xx
Thanks. Send me a link if you make one.
DeleteThanks!
ReplyDeleteHi! Congrats on making it to Links A La Mode this week!
ReplyDeleteHahaha I likes the concept of the bracelet becoming a frenemy bracelet. So creative! You have a good sense of humor :D
Great tutorial!
ReplyDelete