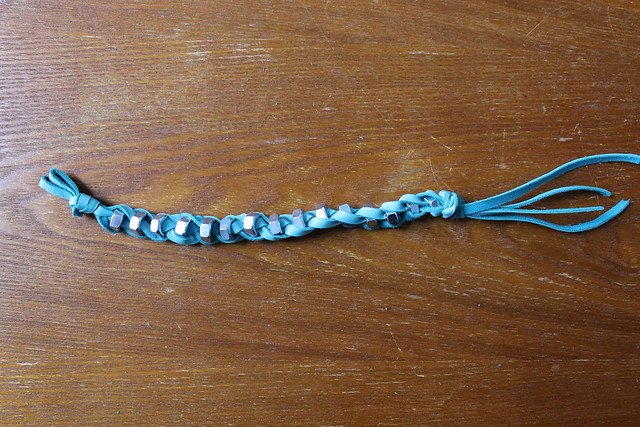
I've seen a number of bracelets incorporating metal nuts as beads and I thought it was such a clever idea, so I came up with a design of my own. This is the first of two DI(fr)Yday tutorials using nuts. Next week I'll show you how to make a really cool ring. But, for now, here's how to make a bracelet.
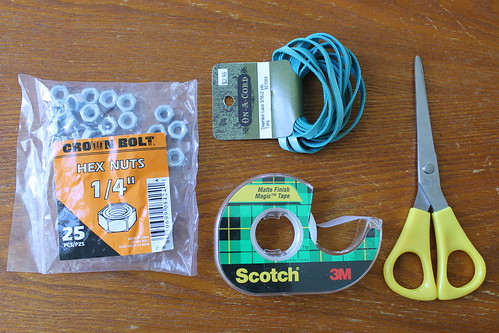
You will need:
- Some 1/4-inch metal nuts (I bought mine in a 25-piece pack for about 50 cents and ended up using 15 of them.)
- Some leather lace in a pretty color like this teal that almost matches my new moccasins (I had 2 yards and ended up with some left over.)
- Scotch tape
- Scissors
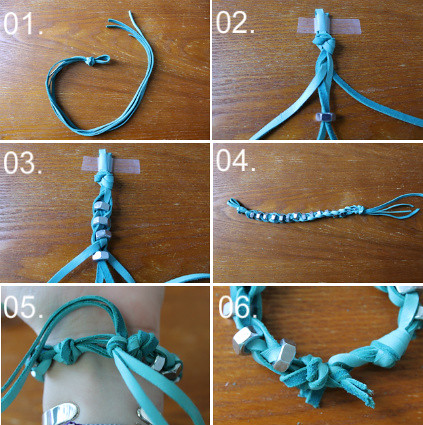
Step 01. Cut your leather lace into two equal pieces. Holding the pieces at the center, tie a knot so that you have a double-stranded loop with four strands of leather coming off it.
Step 02. Tape your loop to a table or another sturdy surface. Begin your four-stranded braid by numbering your strands from left to right. Cross strand Four over strand Three and strand Two over strand One. Then cross One over Four (they're in the middle now) as you thread both through the center of a metal nut. Look to the photo for a clear illustration of how this works.
Step 03. Continue braiding in this way, adding a new nut each time until you've reached your desired length. For me, this took fifteen nuts.
Step 04. Make sure your braid is good and tight before tying a knot at the end.
Step 05. Tie the bracelet around your wrist by threading two strands through the loop and tying them to the remaining two strands.
Step 06. Trim the ends. I made my bracelet loose enough that I can slip it on and off without having the untie and retie the ends, and I recommend you do too. That way you can trim the ends nice and short.
Wear your new bracelet with pride!


0 comments:
Post a Comment