Today I made a small project that I hope will make a big difference. Here's what...
A bit of background... One thing you discover when living in a one bedroom apartment is that having different sleep schedules is a challenge. My boyfriend has to wake up at 5:30 most mornings to be at the hospital by 6, which means that he almost always goes to bed before I do. Since, there are only two rooms in our apartment (the Bedroom, and the Rest of It), this means that I either have to sit in darkness or he has to fall asleep with light coming in. Of course, we could close the door between us, but, if we do, the cat scratches at it, which also makes it hard for him to sleep.
Luckily, I have a plan. During college, I became a Master of Sleeping in the Daytime. The secret (besides being really, really sleepy) is a glorious thing called a sleep mask. If you've ever used one then you know how they keep your eyes shut without engaging your muscles and how they block all light from coming in. It's like burying your face under a pillow except that you can toss and turn all you want and the pillow comes with you because it's attached to your face.
And they don't have to look creepy like the one the mother wore in Matilda that used to give me nightmares.
The only known incident of a sleep mask making it harder for someone to sleep
Some of them are actually quite stylish like the one Carrie wore in Sex and the City with her initials "CB" (incidentally also my initials) on it. Or, what about Audrey Hepburn's classic blue one from Breakfast at Tiffany's?
Or what about these lovely things? Just looking at them makes me want to make a bunch for myself and friends!
* * *
But, I'm not making anything sweet, feminine, or floral today. Instead, I made a simple and masculine mask from scraps left over from dresses I recently made.
-Red and black buffalo plaid flannel from the Lumberjack Dress
-Black silk chemise from the Tea Dress
-Black piping from the Lolita Dress
(For links to the making of these dresses and more see my new Dresses I've Made page)
Not only are these scraps masculine looking, but I think their use will also satisfy Ryan in that he hates buying unneeded stuff and appreciates salvaging leftovers.
I really lucked out, because the scraps I have not only go together colorwise, but making one side of the mask flannel and one side silky means that he can flip it around and be comfortable whether he prefers a warming sensation or a cooling sensation on his eyes.
Here's how I made it...
First I made a pattern by drawing around this old sleep mask I got at Claire's years and years ago.
I placed the pattern on the plaid flannel on the bias (at an angle) to give it a cute diagonal design.
I cut out a little bigger than the pattern to leave room to sew. I did the same with the black silk chemise and with some quilt batting (also leftovers - courtesy of my mom).
With the right side up, I lined up the edge of the piping with the edge of the mask shape and pinned it all around. (August loves pins)
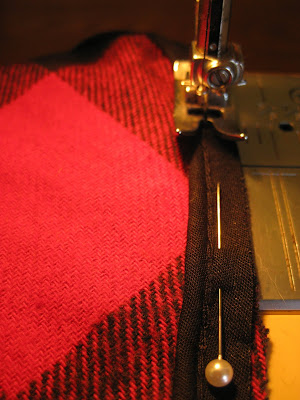
The I sewed. Normally one might sew the piping at the same time as everything else, but since I have so many layers, I thought sewing it separate would be easiest.
Here come the layers! I lay the silk chemise, right side down, on top of the flannel and lay the batting on top of it, then I pinned all around.
I pinned two lengths of elastic to one side and pulled them all the way through and out through the hole where the mask would be turned.
After sewing, I turned the mask. At this point, the elastic lengths were attached on one side and the hole was on the other side.
I measured how long I wanted the elastic, using my own head, then inserted the ends into the hole, folding in the fabric, and topstitched.
All finished!
Flannel side:
Silk side:


This comment has been removed by the author.
ReplyDeleteAuggie wants a sleep mask too, Mommy.
ReplyDeleteLucky man!
ReplyDeleteI never slept with a mask. Maybe I should make one and try it out :)
ReplyDeleteGreat post
XoxO
Plami
http://fashion-thrill.blogspot.com/
Hmmmm.
ReplyDeleteI might just try this. Especially since it's getting lighter here now. Nice of you to provide a step-by-step!
~ * ♥ * ~
ReplyDeleteThis looks great Célèste; I want to make my own sleeping mask at some point and you have shown me just how easy it is!
xox,
bonita of Depict This!
~ * ♥ * ~
I love sleeping masks! Everyone laughs when they discover i use them but it makes sleep easier. Great DIY project
ReplyDeletehouse-in-tillford.blogspot.com