



Bookish and Belle banner (without tabs) Outfits Recipes Crafts Home Wedding
Showing posts with label kitchen kitsch. Show all posts

Monday, May 13, 2013

Spring recipe: Totally Amazing Mushy Peas

Totally Amazing Mushy Peas Recipe

Mushy peas might be a dish you remember fondly from childhood, or they could, just as soon, be terrible childhood memory for you. Either way, you probably don't associate them with class or good taste.

If I were competing on the TV show, Chopped, I might try to trick you by calling this a "purée." But, let's be honest; these are mushy peas!

Now, I can be picky about food, and I definitely can be discriminating when it comes to quality (If you really want to see a person get passionate, ask me about Floridian tomatoes vs. Mexican tomatoes sometime and watch my ears start smoking), but I am not a food snob.

In fact, as I've mentioned before, I have a big soft spot in my heart for food some might call "tacky" or "trashy" but that I lovingly refer to as Kitchen Kitsch. And it's in that spirit that I share my favorite mushy peas with you.

Besides, these are not the mushy peas of your childhood. These are Totally Amazing Mushy Peas.
Totally Amazing Mushy Peas Recipe

I've adapted my recipe slightly from a Nigella Lawson one. It was her brilliant idea to cook the garlic along with the peas. I use yogurt instead of her recommended crème fraiche simply because I always have some on hand, which makes whipping these up to accompany dinner super easy. I sometimes add fresh mint as well, but, if I don't have it on hand, I don't sweat it; these are lovely and yummy on their own.

For some reason, I'm always reminded to eat peas in the springtime, even though I almost always cook them from frozen so it doesn't much matter what time of year it is. You can use fresh peas if you want, but it's not necessary; peas freeze remarkably well.

Ingredients:
5 ounces frozen peas
1 clove garlic
2 tablespoons nonfat greek yogurt
2 tablespoons grated fresh Parmesan cheese
Salt and pepper

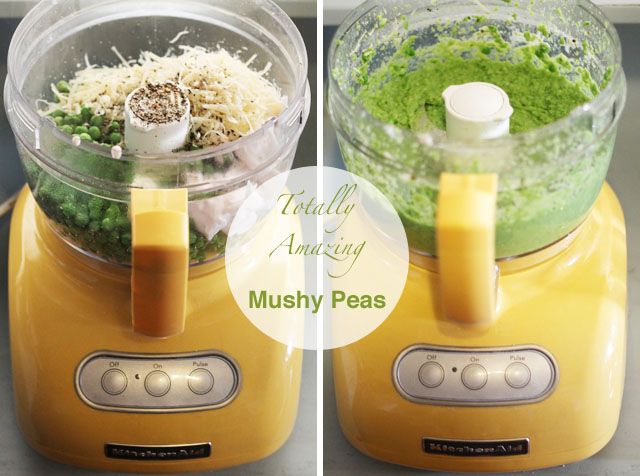
01. Bring a pan of salted water to a boil. Cook garlic and peas until tender.
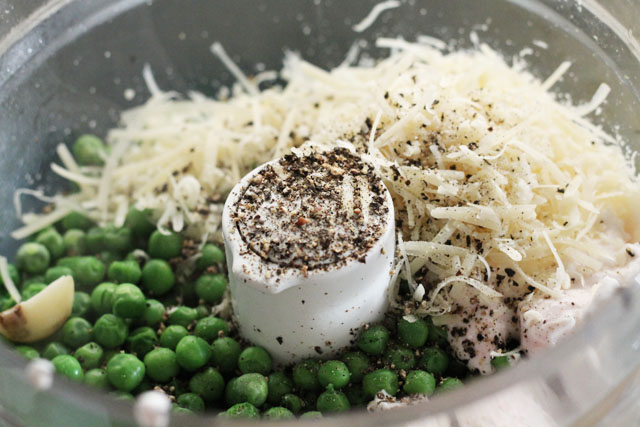
02. Drain. Transfer peas and garlic to a food processor. Add the remaining ingredients, giving a good grinding of pepper.
03. Purée. Taste, and add more salt if needed. 

signature color

Thursday, April 4, 2013

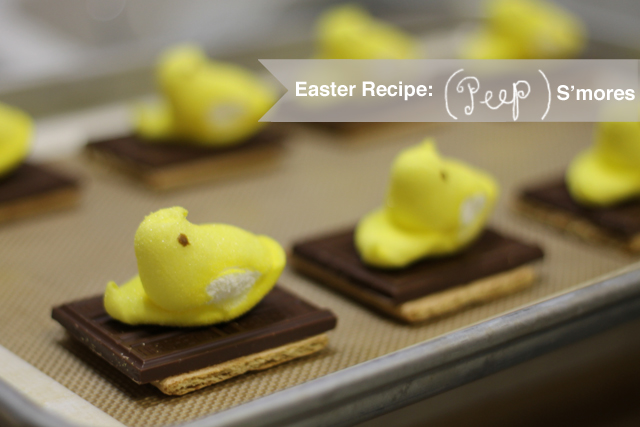
Easter Recipe: Peep S'mores

smores

Traditionally, for me, Peeps have never been anything more than a distraction from Reece's eggs which, having a superior peanut butter : chocolate ratio to the standard Reece's cups, are basically the greatest thing ever.

Marshmallows, on the other hand, are not really my bag unless homemade, miniature and melting atop hot chocolate, or toasted and sandwiched with chocolate between graham crackers.

I suspect a lot of you feel the same way, which is way I'm sharing the only way to eat a Peep: Peep s'mores.

Easter recipe: Peep s'mores

And, if you think of s'mores as strictly a camp-ground food, think again. They can easily be made in large batches in your own kitchen using a broiler.

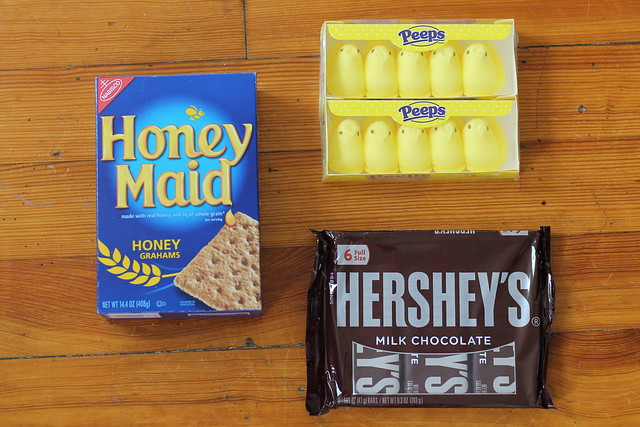
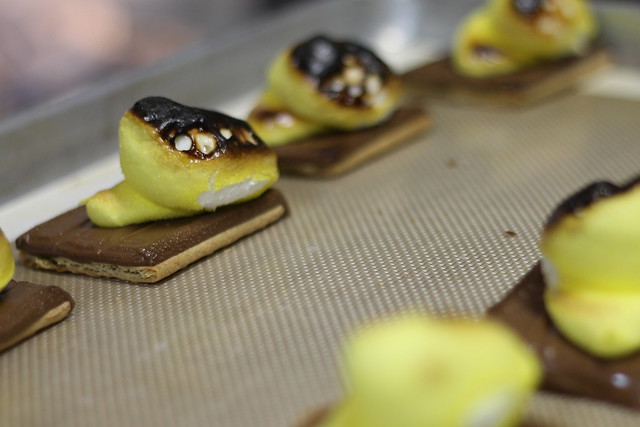
I made these with my brother just before sitting down to the Game of Thrones season premiere (talk about bliss!) We arranged the peeps atop a square of chocolate and a square of graham cracker, and popped them under the broiler until the peeps were toasted on top and the chocolate was a little melty.

Then, we topped them with graham crackers and baked them for a minute or two, just until the peeps were melty throughout. I felt a bit sadistic subjecting these little guys to the flames, but boy were they tasty!

Easter recipe: Peep s'mores

signature color

Wednesday, April 3, 2013

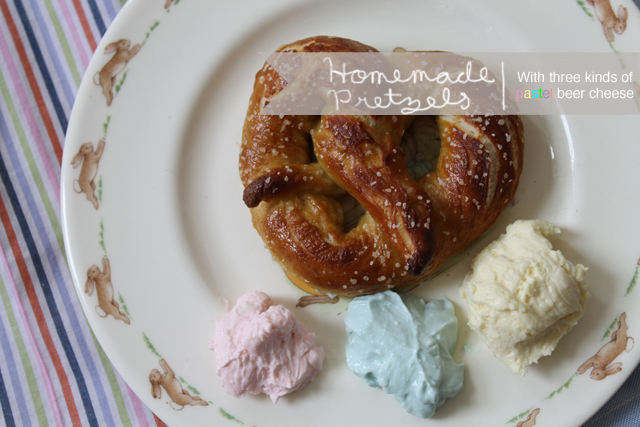
Easter Recipe: Homemade Pretzels with Three Kinds of Pastel Beer Cheese

pretzel

Since moving to Cincinnati, a very German city, at the age of 10, I've learned a lot about the importance of beer, good pretzels, and dark Jewish rye. (Did you know that more Germans live in Cincinnati than in any other city outside of Germany?)

So it was only a matter of time before I decided to try my hand at pretzel making. Ryan, who grew up Catholic, suggested we make them for Easter, explaining that pretzels were first created as a symbol of the holy trinity (because of their three holes).

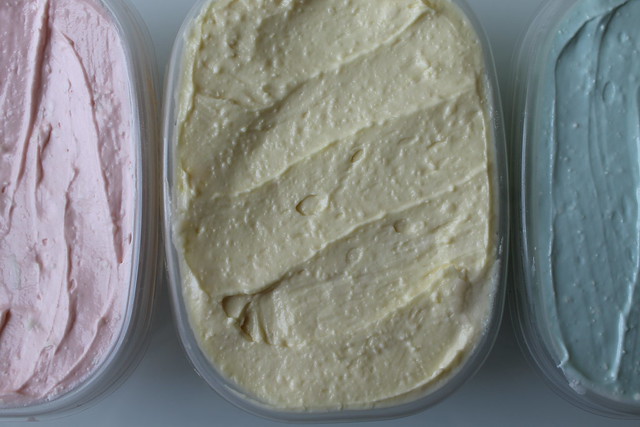
I quickly decided that their accompaniment should be a much less holy (and much more tacky) symbol of Easter: pastel beer cheese!

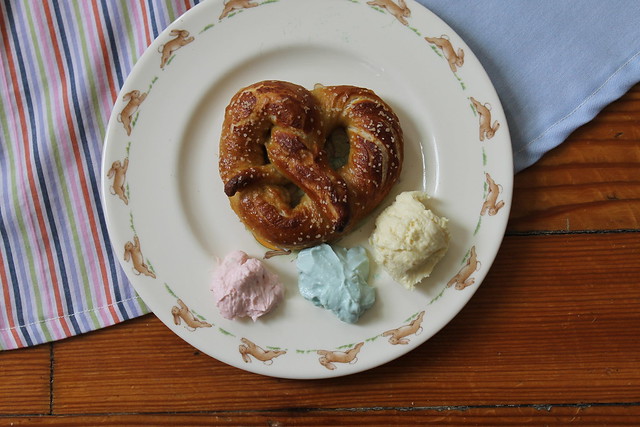
Easter recipe: homemade pretzels with three kinds of pastel beer cheese

We used Alton Brown's recipe for the pretzels, and I made the beer cheese by mixing 8 ounces each of cream cheese and another cheese in a food processor with about 2 ounces of beer (I used Yuengling) to smooth everything out and help the parts combine.

For the yellow, I used white cheddar and a few drops of yellow food coloring; the blue has blue cheese and a few drops of blue food coloring; and the pink has goat cheese and just one drop of red food coloring.

The cheddar was definitely my favorite. Possibly because eating sky-blue beer cheese is a bit off-putting (even to weirdos like me that love a little kitsch and camp in the kitchen). But, more likely, because I just love sharp cheddar, and it seemed to compliment the flavor of beer best.

That said, a little trinity of cheeses set beside a platter of homemade pretzels definitely makes a big impact.

Easter recipe: homemade pretzels with three kinds of pastel beer cheese

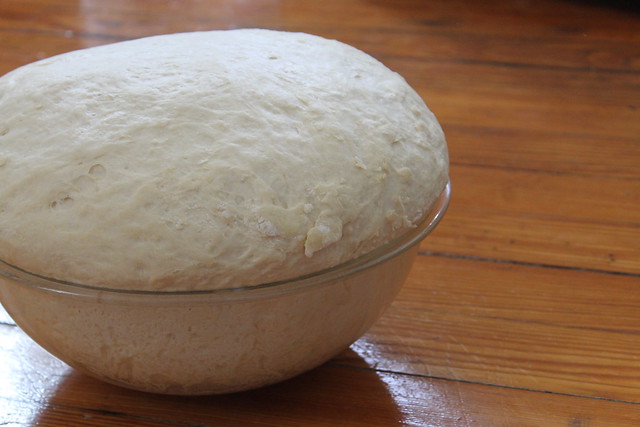
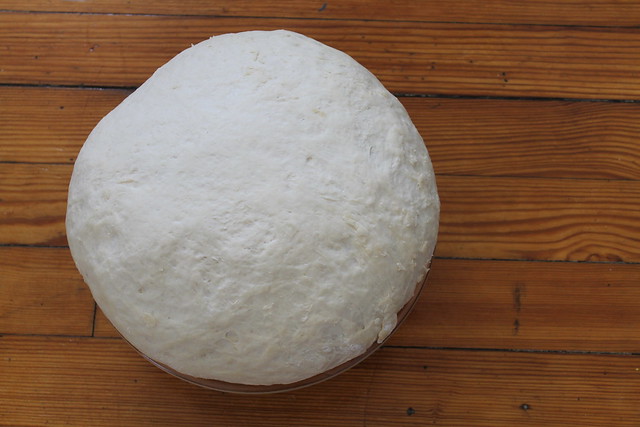
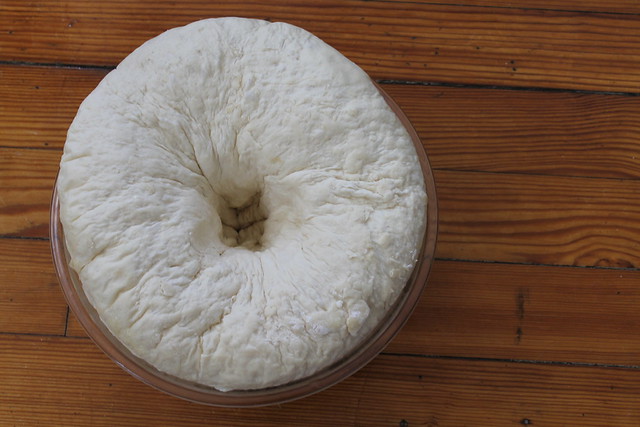
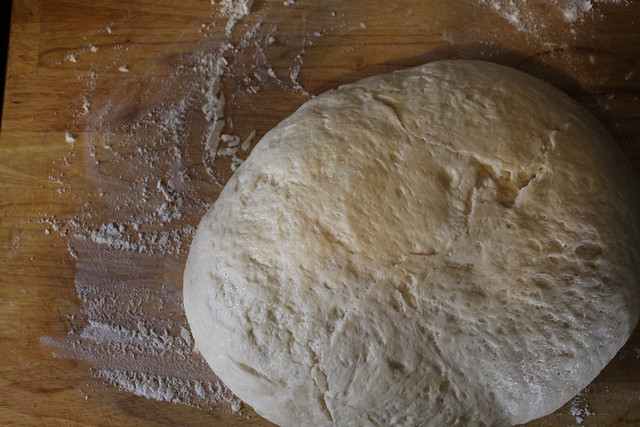
When the pretzel dough rises, it doubles in size. Since I made a triple recipe (did I mention the catholic family?), I ended up with a gorgeously huge dough baby spilling out of the biggest bowl I own. Punching that baby down was a blast, let me tell you. 

Easter recipe: homemade pretzels with three kinds of pastel beer cheese

P.S. Ryan's immediate family isn't actually that big. I made a triple recipe because I'm greedy and wanted to eat several pretzels out of the oven and several for breakfast Monday morning.

P.P.S. Check out this vine video I made. Those are Ryan's hands. He is way better at shaping pretzels than I am. 


signature color

Wednesday, March 27, 2013

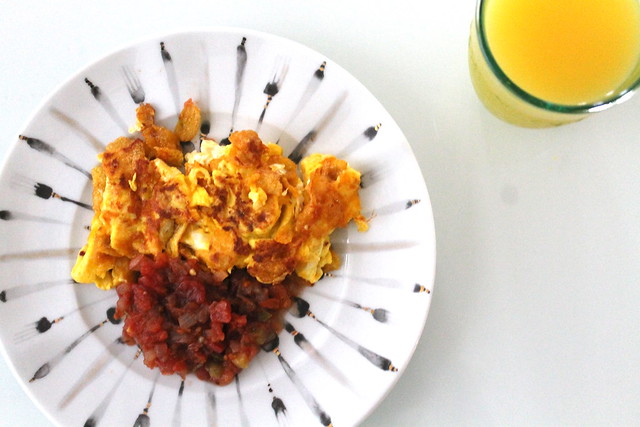
Recipe: Corn-flake migas

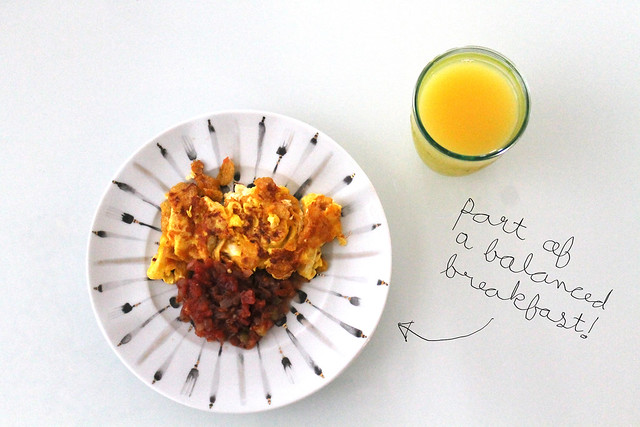
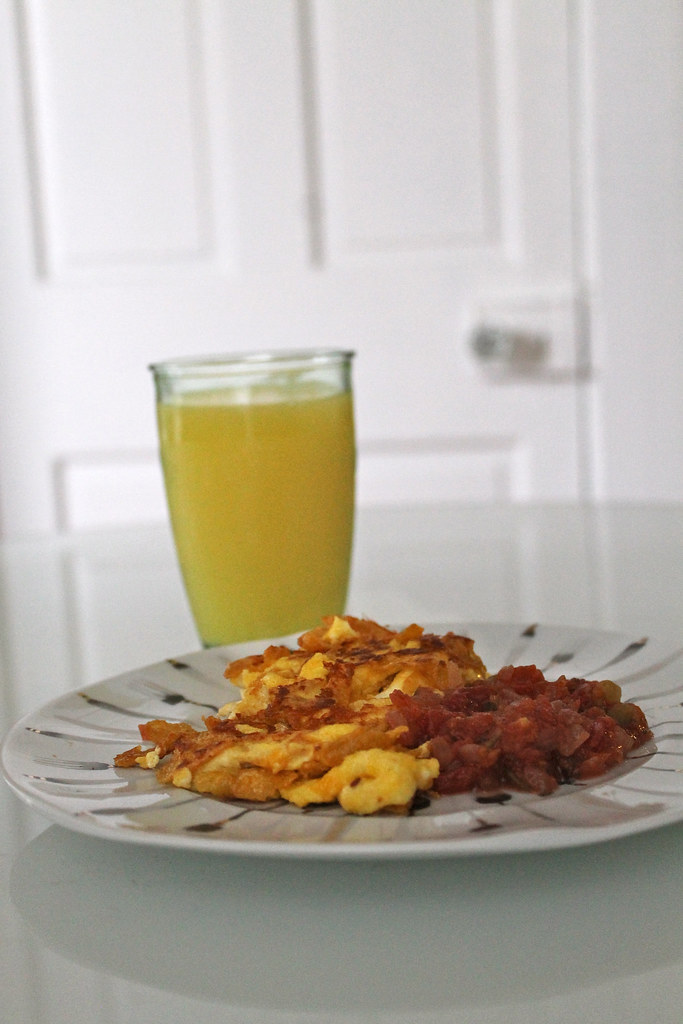
Cornflake migas recipe

Growing up in my family, migas were standard breakfast fare. They were our most common way of cooking eggs, and probably our most common breakfast food after cereal.

So, I was quite surprised when I mentioned them to Ryan one morning and was met with a blank stare and the request that I repeat myself. I did. Once again, a blank stare. "What word are you saying right now?" he asked.

I, of course, immediately taught him the pleasures of scrambling your eggs with bits of tortilla chips and cheddar cheese. He responded enthusiastically, and it wasn't long before he'd invented his own bastard version: Mediterranean migas, made with pita chips and feta cheese.

As a purest, I wasn't entirely sold. However, I recognize that the version I grew up with (using tortilla chips instead of tortillas) is its own bastardization of a Tex-Mex dish that is, in turn, a bastardization of a Spanish dish involving day-old bread.
I think what we can all agree on is that scrambled eggs are better with melty cheese and something crispy-crunchy cooked into them.

It was in that spirit, that I devised this corn-flake version one morning when Ryan and I were getting a bit of the 11AM-and-haven't-eaten-yet crankies, and we didn't have any tortilla chips on hand.

Cornflake migas recipe

Ingredients:
eggs
shredded cheddar cheese
corn flakes
butter
salt and pepper
salsa

01. Heat enough butter to cover your skillet's bottom over medium heat.
02. Crack eggs into a bowl, add salt and pepper, and beat with a small whisk.
03. Pour egg mixture into skillet. Top with just enough cheese and cornflakes to cover.
04. Let cook for a while, scrambling with a spatula as you go.
05. Serve with salsa. Or, as my Texas family calls it, hot sauce.

Cornflake migas recipe

signature color

Wednesday, February 6, 2013

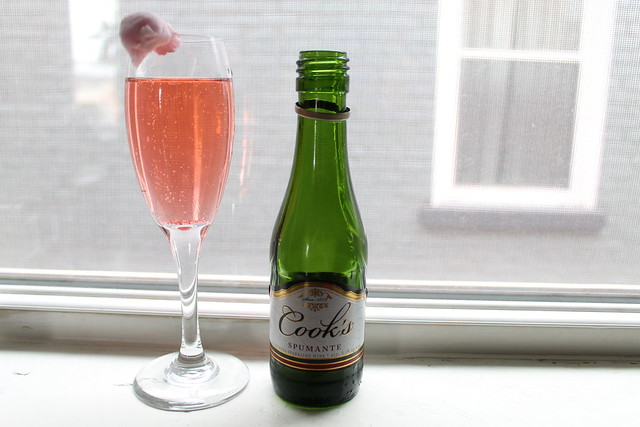
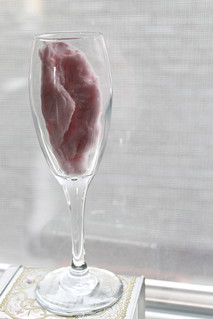
Valentine's Day recipe: cotton-candy champagne cocktail

Valentine's Day recipe: cotton-candy champagne cocktail

What could be more playfully romantic than dissolving a puff of pretty, pink cotton candy in a bubbling stream of chilled champagne?

Valentine's Day recipe: cotton-candy champagne cocktail

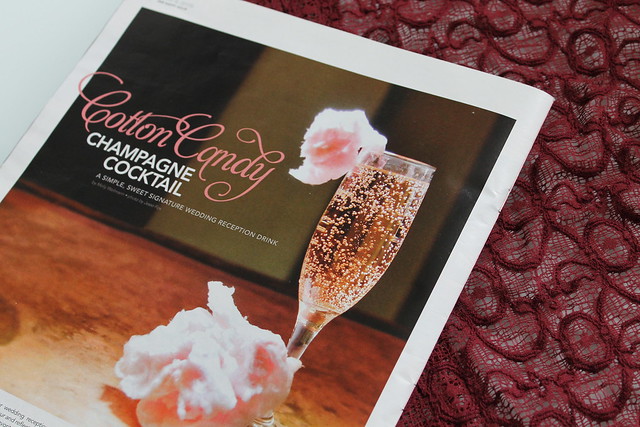
When I saw this idea on the back page of Her Magazine's wedding issue, I knew I had to try it and share the results with you readers.

Valentine's Day recipe: cotton-candy champagne cocktail

For me, ideal Valentine's Day foods are either romantic (fondue), punny (artichoke hearts), or visual on point (anything hear-shaped, red, pink, etc.) This easy and delightful cocktail ticks both the first and third box. And if you can think of a punny name for it, you can tick the second box as well. 

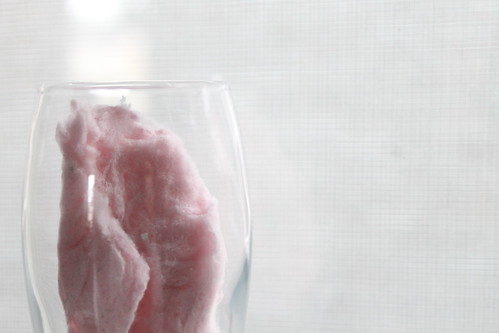
And since making it is so fun -- watching the bubbling champagne dissolve the puffs of candy before your eyes -- it makes a great signature cocktail for a party. I suggest creating a make-your-own cocktail bar with puffs of candy artfully displayed alongside individually sized bottles of champagne. Galentine's Day, anyone?

Valentine's Day recipe: cotton-candy champagne cocktail Valentine's Day recipe: cotton-candy champagne cocktail

To see a quick video I made of the process, click here. Oh, and follow me on Vine!

Valentine's Day recipe: cotton-candy champagne cocktail

Join me on: facebook // twitter // bloglovin // pinterest // instagram

Wednesday, January 16, 2013

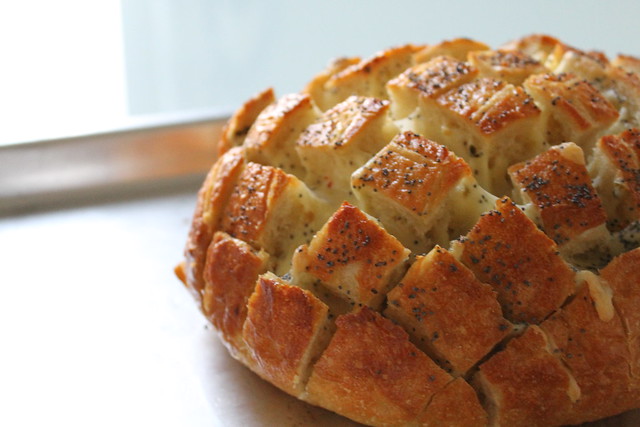
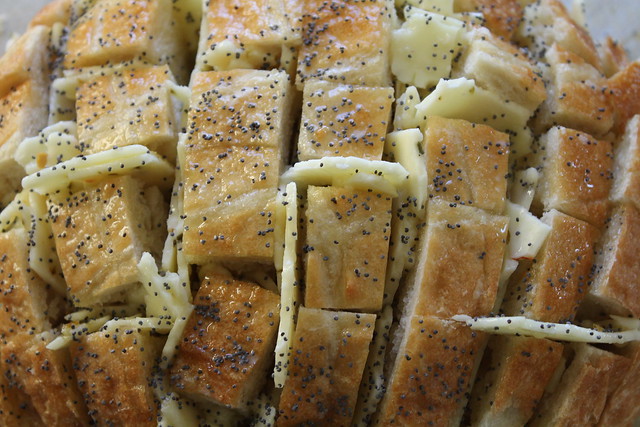
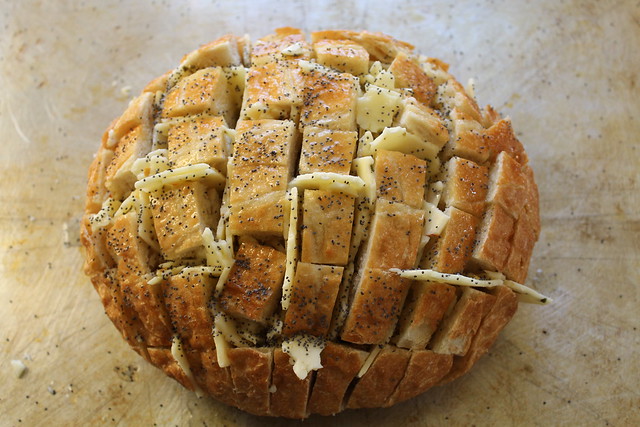
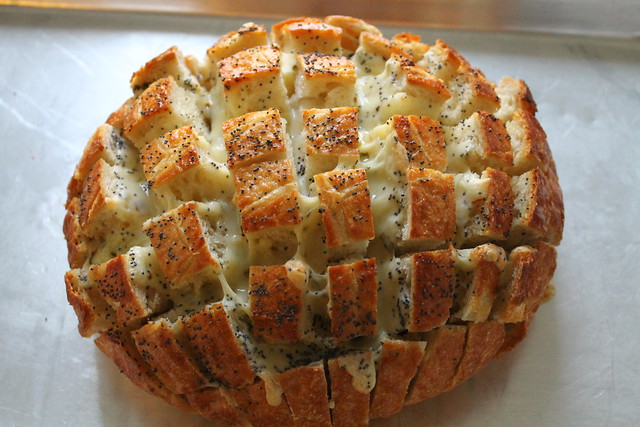
Superbowl recipe: "blooming onion" bread

"Blooming onion" bread

Historically, I haven't taken much notice of the Superbowl. And while I do enjoy watching them game more now than I used to (read: I kind of understand what's happening), my favorite part of this new ritual is making some kind of unapologetically gauche and decadent food to share with friends and family. 

Last year. I made these baked jalapeño poppers, which were quite popular with Ryan's parents. This year, I'm considering my options. How do you top jalapeños wrapped in crescent roll? You consult Pinterest of course. 

...That's where I came across this little gem of an idea: "blooming onion" bread. 

"Blooming onion" bread

The concept is that you take everyone's favorite part of a blooming onion: the way people pulls off tasty morsels of food from a communal golden bloom, but you replace the whole onion part with cheesy bread. What could be better than that?

I basically followed this recipe, but I used pepper jack cheese instead of plain Monterey Jack. I also skipped the green onions, used less butter, and sprinkled the poppy seeds on after drizzling the butter (rather than mixing them into it). Since I was out of foil, I baked the whole thing, unwrapped, for about 25 minutes, which worked just fine for me. 

"Blooming onion" bread

Join me on: facebook // twitter // bloglovin // pinterest // instagram

Monday, February 27, 2012

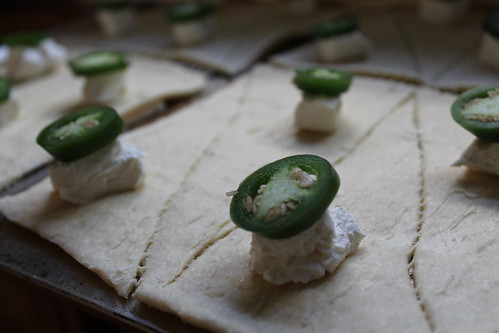
Party recipe: Baked jalapeño popper pockets

Party recipe: Baked jalapeño popper pockets

I made these a while back for Super Bowl Sunday (along with the red velvet brownies), and was happy to see them disappear quickly.

For me, these are exactly what party food should be: satisfying, fatty, fun, bite-sized, and easy to make.

Ingredients:
1 tube Pillsbury crescent-roll dough
About 8 Tbsp cream cheese
1 large jalapeño

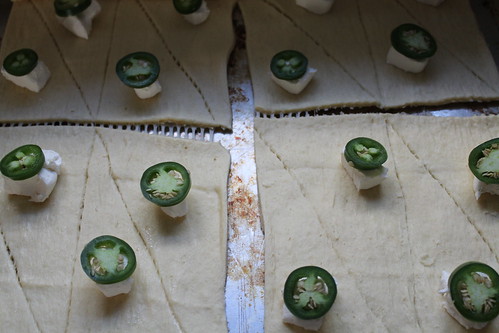
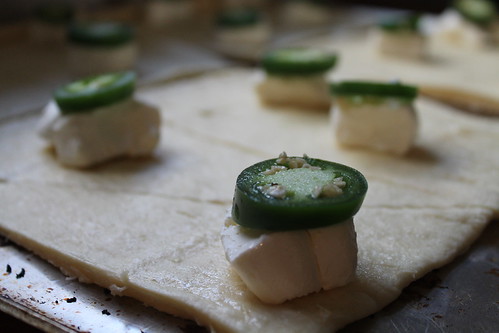
Step 1. Cut the cream cheese into 8 equal squares and the jalapeño into into 8 equal slices.
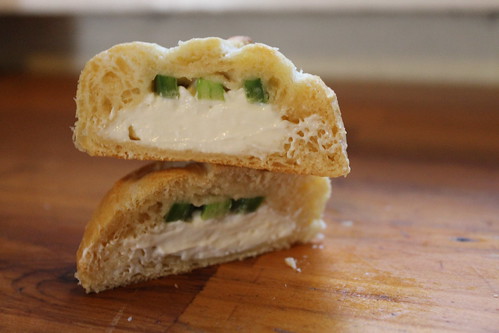
Step 2. Unroll the crescent-roll dough and place a square of cream cheese in the middle of each triangle, topping with a jalapeño slice.
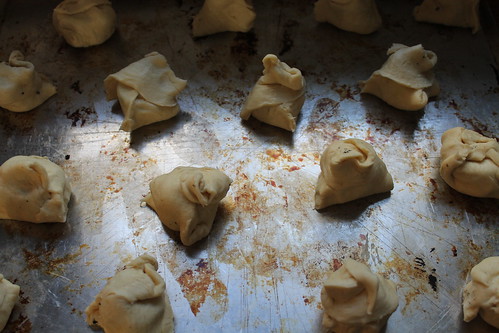
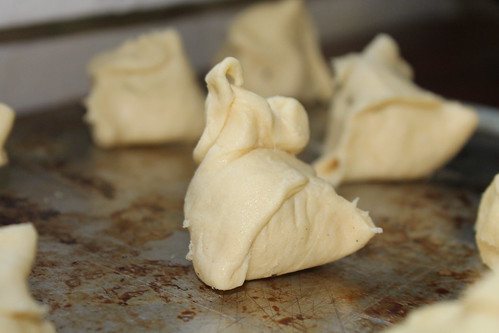
Step 3. Tear each triangle of dough free at its perforated edge, and twist the corners up and together, forming small pockets and completely sealing off the cream cheese and jalapeño slices inside.
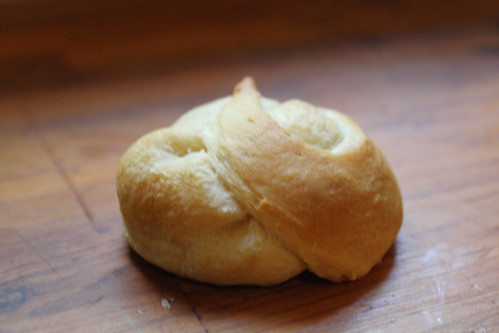
Step 4. Bake according to the crescent-roll directions.

Party recipe: Baked jalapeño popper pockets
Party recipe: Baked jalapeño popper pocketsParty recipe: Baked jalapeño popper pockets

Join me on: facebook // twitter // bloglovin // pinterest // instagram

Tuesday, January 24, 2012

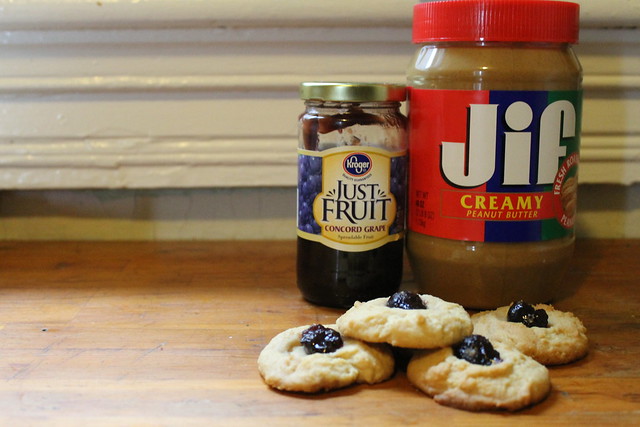
Peanut butter and jelly cookies recipe

Peanut butter and jelly cookies recipe

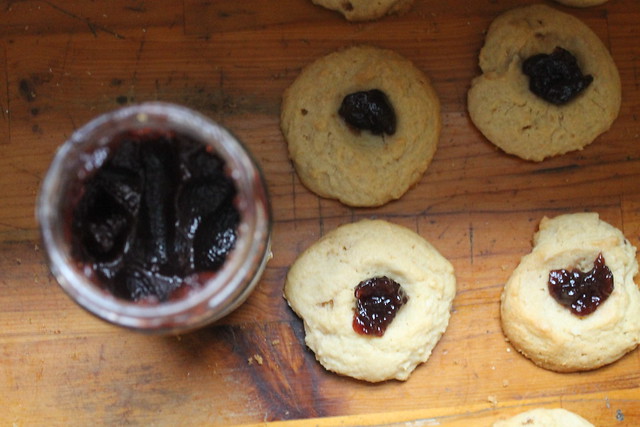
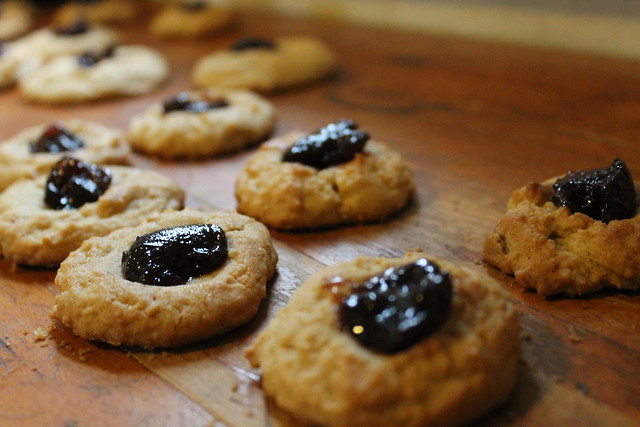
I saw some thumbprint cookies the other day and remembered how much I loved making them as a kid. I wanted to make some again but put a new spin on it. So, I decided to make them peanut butter and jelly cookies.

Peanut butter and jelly cookies recipe

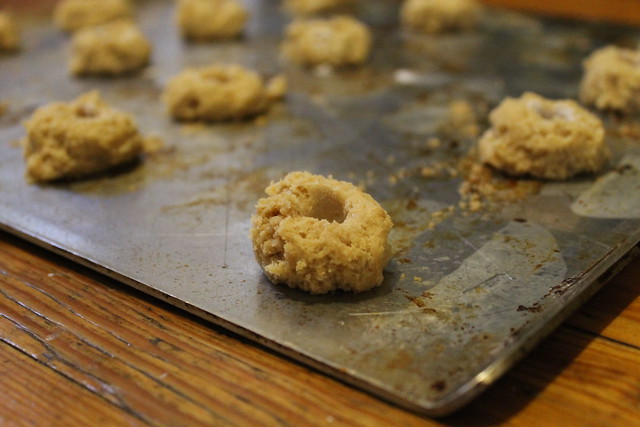
I used this recipe for the peanut butter cookie base, but, instead of pressing them with a fork, I marked a well in their centers with my thumb. Dipping your thumb into flour again every cookie or two is the key to making this step easy.

Peanut butter and jelly cookies recipe

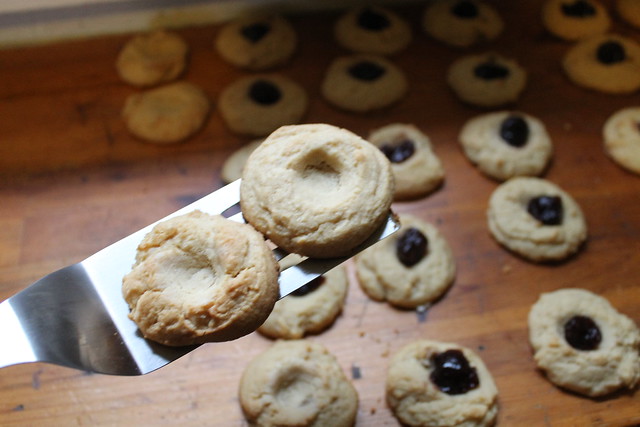
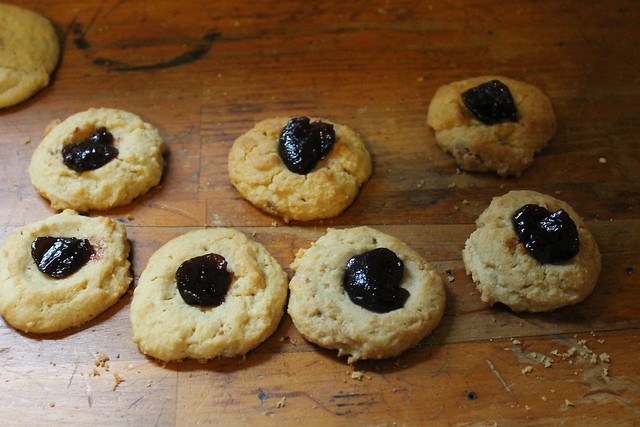
Then, after baking them, I added spoonfuls of grape jelly. You could use any flavor, but I think grape and strawberry would be best for achieving that classic PBJ flavor combination.

Peanut butter and jelly cookies recipe

If I did it again, I'd add the jelly to the thumbprints before baking instead of after. It works fine this way, but they'd have a smoother surface if I'd let the jelly melt down a bit during the baking process.

Peanut butter and jelly cookies recipe

Follow Fashion is Evolution

Follow fashionisevo on Twitter

Enter your email address:

Sunday, December 4, 2011

Holiday recipe: sugarplum ham made with Dr. Pepper

Sugarplum ham

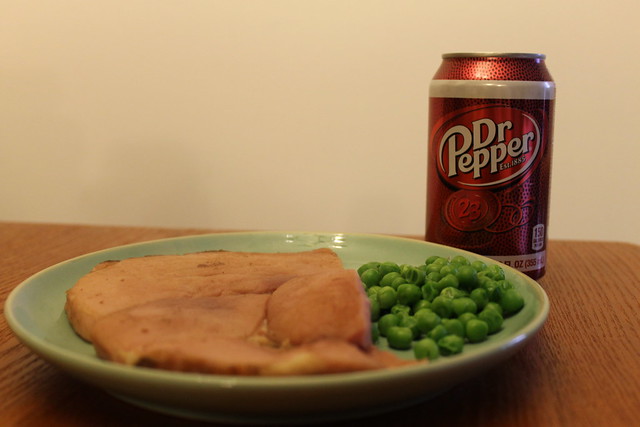
Today we had a fun and easy lunch that was equally retro kitsch and innovative: sugarplum ham steaks made with Dr. Pepper. Nigella Lawson has a famous recipe for ham in Coca Cola. She then created this abbreviated version using ham steak, which I used as the base for this, changing the Coke to Dr. Pepper and altering the spices. Here's my version; serves two . . .

Ingredients:
1 can Dr. Pepper
1 ham steak, about half an inch thick
1 Tbsp Worcestershire sauce
1 dash Tabasco
1 tsp cinnamon
1/2 tsp ground ginger
A good grinding of black pepper

Step 1. Put all ingredients except ham in a sauce pan and boil until it has reduced by about half.
Step 2. Put the ham steak in a dry skillet over medium heat. Pour about half the sauce onto the ham (use the rest to make beans later -- really good!).
Step 3. Cook the ham for about 5 minutes on each side.

Follow Fashion is Evolution

Follow fashionisevo on Twitter

Enter your email address: