



Bookish and Belle banner (without tabs) Outfits Recipes Crafts Home Wedding
Showing posts with label sweet. Show all posts

Wednesday, December 17, 2014

Holiday Recipe: Candy Apple Pie

Candy apple pie

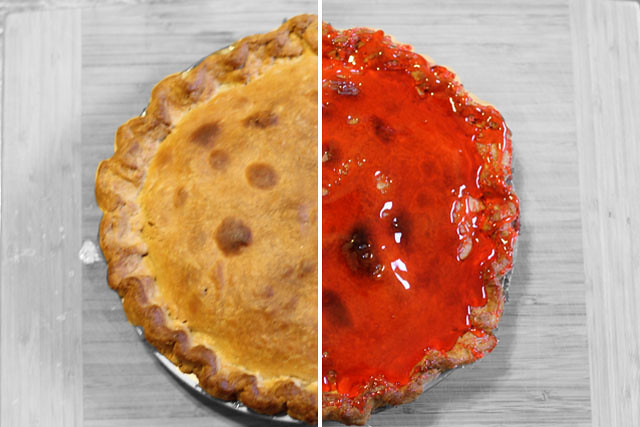
I love trying new pies for Thanksgiving, and I usually gravitate toward classics with a twist. This year I made the pumpkin creme pie I make every year at Ryan's request, and a candy apple pie. The candy apple pie was pretty neat because it had a delicious cider-caramel sauce on the inside and a hot cinnamon candy shell on the outside. If you have trouble choosing between caramel apples and candy apples when you go to the fair, then this is the pie for you. It was pretty hard to cut, though. So, if I made it again, I'd make less hard candy to give it more of a drizzle that a full coat. 

Candy apple pie

Recipe slightly adapted from First Prize Pies

Ingredients:

Crust:
3/4 cup unsalted butter
1/4 cup shortening
1/2 cup whole milk (plus extra for glaze)
1 T. apple cider vinegar
12 ounces or 3 cups flour
1 T. cornstarch
2 T. sugar
1 1/2 t. salt

Filling:
2 cups apple cider
1/2 cup unsalted butter
3/4 cup firmly packed brown sugar
3/4 cup heavy cream
1 t. pumpkin pie spice
1/2 t. salt
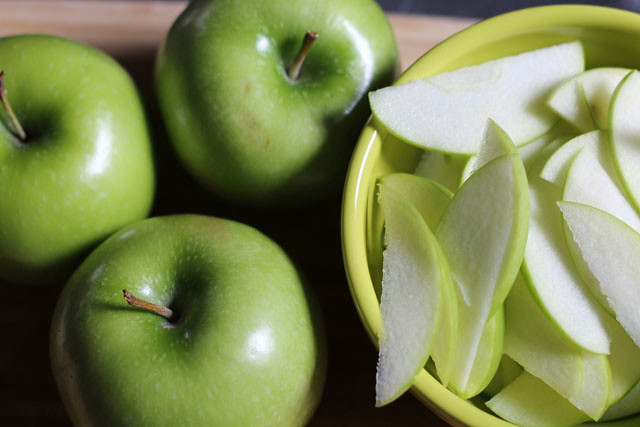
1 1/2 pounds granny smith apples, peeled and thinly sliced

Candy topping:
1 cup sugar
2/3 cup light corn syrup
1 t. cinnamon extract
10 drops red food coloring
Candy apple pie

Step 01. Cut butter into roughly 1/2 inch cubes. Combine dry ingredients in a food processor with a quick whirl. Add butter and blend until mixture is the texture of rough sand. In a measuring cup, stir vinegar into milk. Turn on food processor, and slowly pour milk mixture through the feed tube. Turn processor off as soon as combined. Do not over mix. Wrap dough in plastic wrap or wax paper and refrigerate at least 1 hour.

Step 02. Preheat oven to 425ºF (220ºC). Roll out half the dough into a circle about 11 inches in diameter. Transfer to a 9-inch pie pan. Trim overhang to 1 inch and refrigerate crust.

Step 03. In a heavy-bottomed saucepan over high heat, boil cider until reduced to about 1/2 cup. Lower heat to medium-high, melt butter into cider syrup, and whisk in brown sugar, cream, pumpkin pie spice, and salt. Bring mixture to a gentle boil and cook until dark, thick, and glossy (about 7 to 10 minutes). Remove from heat and cool until just warm.

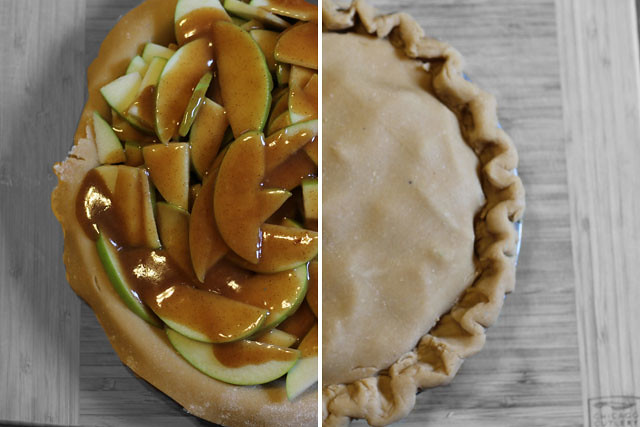
Step 04. Layer apple slices in pie crust and pour caramel sauce over. Brush edges of pie shell with some of the milk reserved for glaze. Roll out remaining pie dough, lay it over the filled pie shell, and trim overhand to 1 inch. Roll edges of both crusts together and crimp. Brush top and edges of pie with remaining milk reserved for glaze.

Step 05. Back pie on a baking sheet for 20 minutes, rotating once halfway through. Lower temperature to 350ºF (175ºC) and back for 30 to 40 minutes until crust is golden. Remove to a wire rack to cool.

Step 06. Wait until pie is cooked to begin candy shell. In a heavy-bottomed saucepan, heat sugar, corn syrup, and 1/3 cup water over high heat. Cook until the syrup reaches 300ºF (150ºC) on a candy thermometer. Remove from heat and whisk in cinnamon extract and food coloring. Use a fork to drizzle liquid candy over pie. Do not refrigerate pie (it will soften the candy crust), and serve as soon as possible. 
Candy apple pie

Monday, November 24, 2014

Thanksgiving Recipe: Cranberry Jello Shots

Thanksgiving recipe: cranberry jello shots

I made these for a potluck friendsgiving-style party that we went to on Friday. It was a fun time. Our friend lives in an apartment building-cum-gallery, and she and some of her artist/art-history-buff friends came up with a game called "Drunk Art History," inspired by the show Drunk History, of course. Everyone picked a piece of famous artwork out of a hat and, after some drinking, we gave 3-minute boozy lectures with the aid of a projector.

I got the recipe here, but I used raspberry Jell-O because I couldn't find cranberry. They were delicious. The cranberry juice combined with the raspberry Jell-O for the perfect cran-raspberry taste.

I wasn't quite sure how to roll the cranberries in honey and sugar, so I just drizzled honey over them in a bowl and stirred, then added a few tablespoons of sugar and stirred again. That method worked well, and I'd recommend it if you give these a try. I was able to get 28 shots out of the recipe, so I only sugared about 40 cranberries, saving the rest of the bag for Thanksgiving cranberry sauce.

Looking for a last-minute Thanksgiving contribution or a quick way to get your family drunk? Look no further.

Thanksgiving recipe: cranberry jello shots

Monday, June 16, 2014

Yummy Recipe: Peanut Butter and Jelly Pie with Saltine Crust

Peanut butter and jelly pie with Saltine Crust

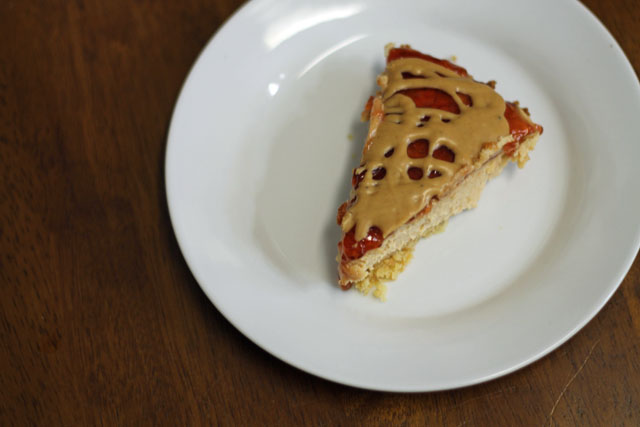
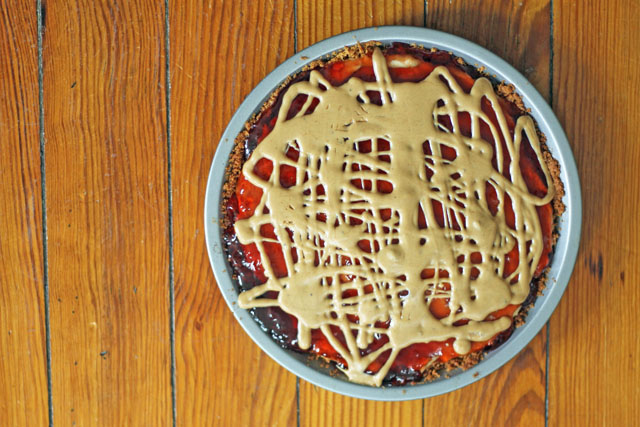
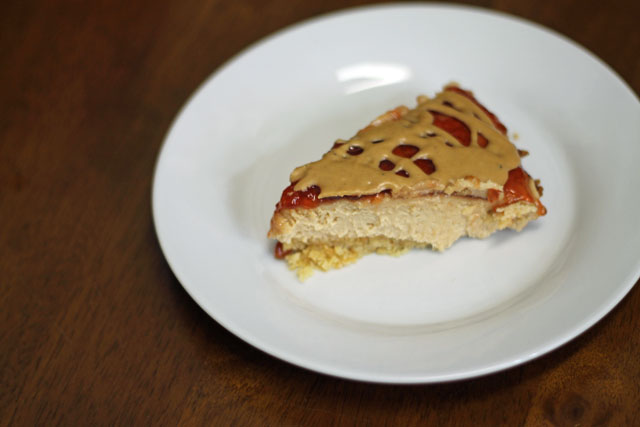
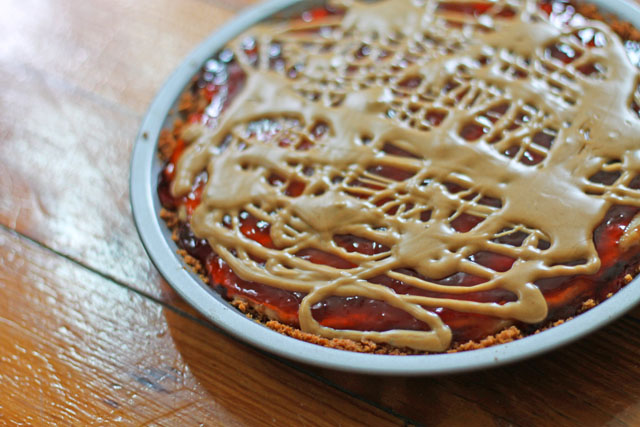
I recently got this book, and I've been really inspired by all her ideas for creative pie flavors. Last week, I made this peanut butter and jelly pie for a family birthday dinner, and it was a big hit.

I only strayed from Allison Kaye's recipe in a couple places: using strawberry jam over her preferred grape and decorating the top of the pie with a drizzle of melted peanut butter instead of chopped peanuts. I think the drizzle looks really cute.

Ingredients:
about 30 saltine crackers
8 tablespoons butter, melted
3/4 cup heavy whipping cream
6 oz. cream cheese
3/4 cup creamy peanut butter (plus another 1/4 cup for garnishing)
1/2 cup powdered sugar
1 cup strawberry jelly (or your preferred flavor)

Step 01. Preaheat the over to 350ºF. Grind the crackers to smooth crumbs in the food processor and mix with melted butter. Pat into the bottom of a pie pan. Chill for 10 minutes and then back for 10 minutes.
Step 02. Whip the cream until stiff peaks form. Set aside. Mix together cream cheese, peanut butter, and powdered sugar. Combine with whipped cream until fully blended.
Step 03. Spread peanut butter mixture over crust and chill.
Step 04. Melt jelly in a saucepan over medium-high heat until it is a consistent, liquidy texture throughout. Pour melted jelly over peanut butter mixture and continue to chill pie.
Step 05. Melt remaining 1/4 cup peanut butter until it is a consistent, liquidy texture throughout. Pour into a measuring cup on any vessel with a spout. Drizzle slowly over jelly-covered pie. Continue to chill pie until set. Serve chilled.

Peanut butter and jelly pie with Saltine Crust

signature color

Friday, November 8, 2013

DI(fr)Yday: How to Make Paper Cupcake Toppers with Crepe Paper and Toothpicks

DIY Paper Cupcake Toppers

I made these cute little paper cupcake toppers to decorate spice-cake cupcakes for Jenn's sugar-and-spice-themed baby shower. They are so simple and cute, and the use crepe paper, something you might have on hand already if you're throwing a party. 

DIY Paper Cupcake Toppers

You will need:
Crepe paper
Toothpicks
Scotch tape
Scissors

Step 01. Cut your crepe paper into fringe by making slits about every quarter inch or so.
Step 02. Cut a strip that's about three inches long and wrap it tightly around one end of a toothpick.
Step 03. Secure the end with a small piece of Scotch tape.
Step 04. Gently separate the fringy bits with your fingers, fluffing and spreading them until you like the look. 

DIY Paper Cupcake Toppers

signature color

Wednesday, November 6, 2013

Party Recipe: Cinnamon-Roll Pops

Party Recipe: Cinnamon-Roll Pops

I made these for Jenn's sugar-and-spice themed baby shower. They're so easy that this isn't even so much a recipe as it is an idea.

I used Pilsbury cinnamon roll dough, though you could, of course, make cinnamon rolls from scratch if you have the time and prefer. Then just poke a stick or a decorative paper straw through the rolls before baking them. Make sure to use a paper, wooden, or metal stick; don't use anything plastic or anything else that wouldn't be oven-safe.

Party Recipe: Cinnamon-Roll Pops

I think these are so fun. I love food on a stick, especially at a party. It's just way more fun to eat and it looks so festive.

Party Recipe: Cinnamon-Roll Pops

signature color

Wednesday, October 23, 2013

Halloween Recipe: Creepy Black Candy Apples

Halloween Recipe: Creepy Black Candy Apples

I've been wanting to make some creepy black candy apples for a long time, and a party at my friend's house last weekend provided the perfect opportunity.

I love how ominous and poisonous they look, and the natural twigs and occasional tempting, bright-red apples add to the look perfectly. I even used a few thorny twigs for a really eerie and sinister effect.

Halloween Recipe: Creepy Black Candy Apples

I used this recipe, to which all credit should go. But I would change a couple things if I made them again. For one, Matt suggested using light colored yellow delicious or granny smith apples for the red apples (to help the red pop) and red delicious for the black (too keep everything really dark). I found that the granny smiths were a bit too light to properly showcase the color. Even after doubling the amount of food coloring, they still looked a little green under the surface. Maybe yellow delicious would have been better.

Also, I prepared my apples and twigs before even starting the candy. But, it turns out that the candy takes a while to get up to temperature, and it's totally enough time to shank all those apples.

Halloween Recipe: Creepy Black Candy Apples

signature color

Monday, August 12, 2013

Recipe: How to Make a Naked Cake

How to make a Momofuku-Milk-Bar-inspired Funfetti naked cake

I really like the look of the naked cakes Momofuku Milk Bar makes. When I suggested this look for our wedding cake, Ryan was skeptical (wanting something a bit sleeker and simpler, I think), but he said that he thought he'd like the way naked cakes taste since he usually thinks cakes have too much frosting. So, I decided to make him one for his birthday. 

I used Funfetti cake mix and rainbow chip frosting because I am lazy love Funfetti and honestly don't know how to make it from scratch. But, you can, of course, make any kind of cake you want. I just love the way the naked sides of a Funfetti cake show off the dots of color. 

The basic concept for a naked cake is not only to frost just the top of each layer, but also to trim the edges so that the inside of the cake shows. I also like to cut off the rounded top of each layer, which I do even with non-naked cakes (clothed cakes?) because having a flat top makes layering easier.  

For the cake, I made a double recipe (two boxes, four layers). Trimming the tops and sides eats up almost half of each layer. After each layer cooled, I cut its top and sides off with a sharp, serrated bread knife. I used some the the crumbs from the cutoff tops to decorate the top of the cake. 

My cake definitely didn't turn out as perfectly pristine as the Momofuku ones that inspired it, but I like it all the same. Ryan and I thought it looked a bit like a Dr. Seuss cake with its bright colors, drippy frosting, and leaning stature. 

How to make a Momofuku-Milk-Bar-inspired Funfetti naked cake
#Latergram from Thursday: More photos of Ryan's birthday and a cake recipe are coming to the blog next week. #birthday #candlelight #nofilter

signature color

Sunday, August 4, 2013

My Dad's Birthday

Poppa's Birthday
Poppa's Birthday

Last Sunday was my dad's birthday, so I made him a German chocolate cake. We gathered at my parents house, around their pool, although it was really not warm enough to swim. I enjoyed observing my dad spend his birthday doing the things he loves most: playing with his grandson, sitting in his back yard with his family, discussing ancient Rome with my fiancé.

It was a nice reminder that it's the simple things in life that make it so rich. The place you call home, and the people you call family are the most precious gifts of all.

Sorry to get so mushy on you. Birthdays and holidays really get to me sometimes.

Poppa's Birthday

signature color

Wednesday, April 24, 2013

Spring Recipe: Angel Food Cake with Balsamic Black-Pepper Strawberries

Angle food cake with balsamic-back-pepper strawberries

Did you know that in Italy people love to eat strawberries with balsamic vinegar and black pepper? I know it sounds a little nuts, but you just have to believe me that it's the ideal combination of sweet, sour, and spicy. Such a party for your taste buds!

Sometimes we eat this mixture plain (greedily, out of a mixing bowl) and sometimes we put it on salads. But it's also really good on vanilla ice cream. Last week, Ryan's family was getting together for Italian take-out, so I decided to bring an angel food cake and serve it with this yummy, strawberry mixture. It was a hit!

I don't usually add any sugar to the mix when eating this plain or on salad. But, in order to bring out the juices, making it more of a sauce, I added a bit here. I chose brown sugar to further complicate the flavors, but white sugar would also do the trick. 

Angle food cake with balsamic-back-pepper strawberries

Angel Food Cake with Balsamic Black-Pepper Strawberries


Ingredients: 
1 angel food cake (store bought or homemade)
1 pint strawberries
2 tablespoons balsamic vinegar
1 tablespoon brown sugar
A very generous grinding of black pepper

01. Hull and slice strawberries. I like to slice them vertically because I think the strawberry-shaped slices are much prettier than rounds.
02. Mix sliced strawberries with brown sugar, balsamic vinegar, and black pepper.
03. Serve in the hallow of the angel food cake. There will be additional berry mixture to serve alongside as well. 

Angle food cake with balsamic-back-pepper strawberries

signature color

Thursday, April 4, 2013

Easter Recipe: Peep S'mores

smores

Traditionally, for me, Peeps have never been anything more than a distraction from Reece's eggs which, having a superior peanut butter : chocolate ratio to the standard Reece's cups, are basically the greatest thing ever.

Marshmallows, on the other hand, are not really my bag unless homemade, miniature and melting atop hot chocolate, or toasted and sandwiched with chocolate between graham crackers.

I suspect a lot of you feel the same way, which is way I'm sharing the only way to eat a Peep: Peep s'mores.

Easter recipe: Peep s'mores

And, if you think of s'mores as strictly a camp-ground food, think again. They can easily be made in large batches in your own kitchen using a broiler.

I made these with my brother just before sitting down to the Game of Thrones season premiere (talk about bliss!) We arranged the peeps atop a square of chocolate and a square of graham cracker, and popped them under the broiler until the peeps were toasted on top and the chocolate was a little melty.

Then, we topped them with graham crackers and baked them for a minute or two, just until the peeps were melty throughout. I felt a bit sadistic subjecting these little guys to the flames, but boy were they tasty!

Easter recipe: Peep s'mores

signature color