Bookish and Belle banner (without tabs) Outfits Recipes Crafts Home Wedding

Sunday, October 27, 2013

What I wore today: 10/25/2013 (Odette)

Odette outfit: feathery Anthropologie "Guimauve Top", black and white gingham pencil skirt, black tights, quilted black leather boots, black bauble bubble necklace, Noir Jewelry Dinosaur bone rib cage cuff bracelet

I bought this lovely top a few weeks ago. It's downy texture immediately gave me the impression of feathers, so, I figured, why not wear it to see Swan Lake? Ryan and I make it a point to go to the ballet at least once a season. Ballet was my very first love, and I'm thrilled that Ryan has taken to it with such enthusiasm.

He took these photos of me just before we left home (thanks, Rye!) and then pointed out that the mockingbird who hangs out on our block was imitating the "beep-beep" noise of my camera autofocusing. I will admit to jumping up and down when I heard it. It was pretty cool. I love our urban mockingbird.

Odette outfit: feathery Anthropologie "Guimauve Top", black and white gingham pencil skirt, black tights, quilted black leather boots, black bauble bubble necklace, Noir Jewelry Dinosaur bone rib cage cuff bracelet

White feathery-textured "Guimauve Top" - Anthropologie
Black and white gingham pencil skirt - thrifted
Black tights - Spanx, Nordstrom Rack
Black quilted-leather boots - Corso Como, Nordstrom
Black bauble "bubble necklace" - eBay
Dinosaur bone rib cage cuff bracelet - Noir Jewelry

signature color

Wednesday, October 23, 2013

Halloween Recipe: Creepy Black Candy Apples

Halloween Recipe: Creepy Black Candy Apples

I've been wanting to make some creepy black candy apples for a long time, and a party at my friend's house last weekend provided the perfect opportunity.

I love how ominous and poisonous they look, and the natural twigs and occasional tempting, bright-red apples add to the look perfectly. I even used a few thorny twigs for a really eerie and sinister effect.

Halloween Recipe: Creepy Black Candy Apples

I used this recipe, to which all credit should go. But I would change a couple things if I made them again. For one, Matt suggested using light colored yellow delicious or granny smith apples for the red apples (to help the red pop) and red delicious for the black (too keep everything really dark). I found that the granny smiths were a bit too light to properly showcase the color. Even after doubling the amount of food coloring, they still looked a little green under the surface. Maybe yellow delicious would have been better.

Also, I prepared my apples and twigs before even starting the candy. But, it turns out that the candy takes a while to get up to temperature, and it's totally enough time to shank all those apples.

Halloween Recipe: Creepy Black Candy Apples

signature color

Monday, October 14, 2013

Party Recipe: Boozy Bears - alcohol-soaked gummy bears

Party recipe: Boozy Bears, alcohol-soaked gummy bears

Well, hello, Monday Morning! 

This may not be the most appropriate recipe for a Monday morning, but I'm excited to share it with you. Last weekend, I made these for a bachelorette party. They are such a fun party treat to share with friends, and they have a sort of "naughty factor" that makes them perfect for a bachelorette party.

All you do is cover the gummy bears with alcohol and refrigerate them for 24 hours. Then, drain off the remaining alcohol and dish them up.

I used plastic shot glasses from a party store to serve them. I also sorted them by color and soaked each in a different alcohol (passion-fruit rum and whipped cream vodka). 

Party recipe: Boozy Bears, alcohol-soaked gummy bears

signature color

Friday, October 11, 2013

DI(fr)Yday: Wedding cake stands made from thrifted dinnerware

Wedding Craft: DIY cake stands made from thrifed dinnerware

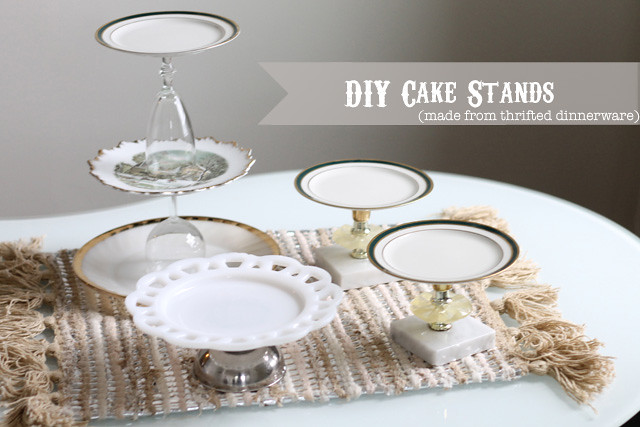
Last weekend, my mom and I tackled another DIY project for my wedding. My mom has made really cool cake stands and tiered tea-cake stands in the past using thrifted dinnerware. She gets really creative with it. So, when it was time to design the look of my dessert table, I knew I wanted to make cake stands with her.

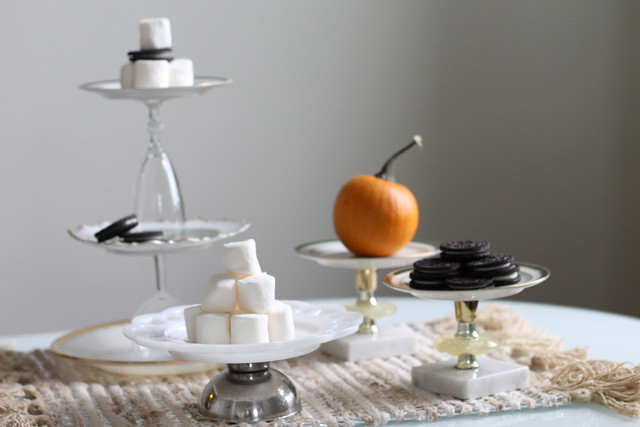
We're going to have a small wedding cake on a stand at the center of our dessert table with a variety of tiered stands of all heights surrounding it, displaying key-lime tarts, powdered donuts, clementines, and assorted candies.

Wedding Craft: DIY cake stands made from thrifed dinnerware

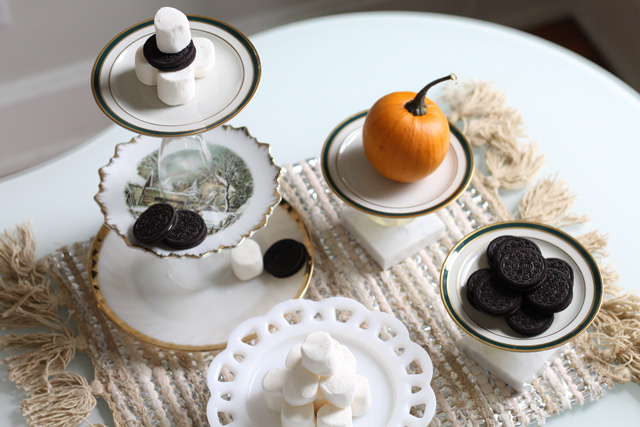
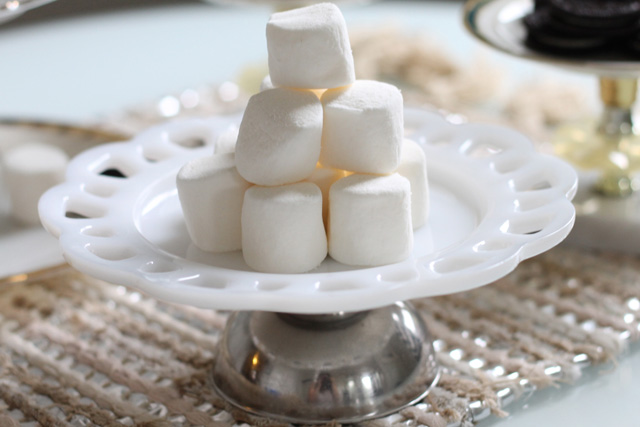
We made a lot more stands than are shown here (but I've got to keep 
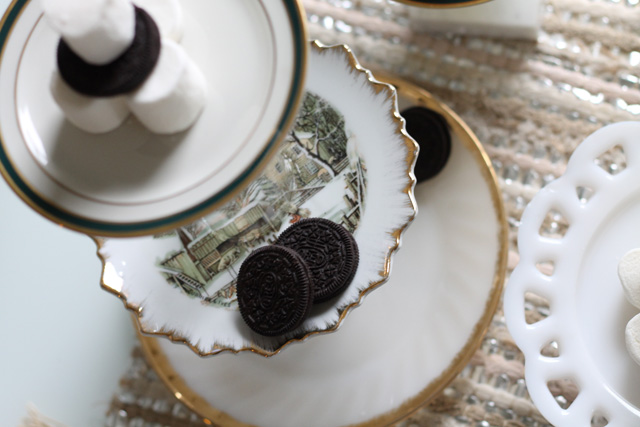
some surprises for the wedding!), and just think how much prettier they'll look displaying treats at my wedding (instead of the random assortment of Oreos and marshmallows that I pulled from my kitchen cabinets for these photos).

It's a really simple process. Basically, you need to select a smattering of plates and trays for the tiers. Then you need some pieces to use I bases and risers. I've found that small bowls and teacups turned upside-down make really good (and sturdy) bases, and that glassware makes good risers. Candlesticks make great risers, too, and can make good bases if they're sturdy enough.

Once you've decided how you're going to match up your pieces, just glue them together using a strong ceramic glue, and let them cure for a good 24-72 hours (or as long as your glue directs you).

Wedding Craft: DIY cake stands made from thrifed dinnerware

If you're making a lot of stands, we've found that the creative process works best if you overbuy a bit. You really need a good assortment of objects in front of you for maximum variety potential. And, since everything is so cheap, it's okay if there are a couple pieces that you don't end up using. Just donate them back to the thrift store for some other lucky person to find; it's the circle of life.

Wedding Craft: DIY cake stands made from thrifed dinnerware

A word on making these sturdy:
The biggest challenge here is making sure that your creations are sturdy enough. Obviously, you want to keep larger tiers at the bottom, selecting smaller ones as you move up, but I have a few other tips and tricks that might be less obvious.

01. In general, single-tier cake stands should have elevating bases, whereas multi-tier stands should be grounded with a plate.

02. Make the bottom heavy and the top light. If you've got a candle stick with a marble base (like the ones pictured), use it as a base for a stand, not as a riser three levels up on a multi-tiered stand. Basically, use gravity in your favor, not against yourself.

03. Use your best judgement. If something feels precarious, it probably is. See if you can rearrange the elements you love together in another way that's sturdier and just as cute.

Wedding Craft: DIY cake stands made from thrifed dinnerware

signature color

Tuesday, October 8, 2013

What I wore today: 10/07/2013 (People Are Like Onions)

Fall layered outfit: Red corduroys, Jeffrey Campbell "Everly" ankle boots, sleeveless chambray shirt, lace-front sweatshirt, lace-embellished military jacket, cross-body Phillip Lim for Target bag

There's enough to love about fall with the apple cider and the PSLs and the changing leaves and the brisk breezes; layering doesn't even need to be a thing. But layering is a thing. It's a glorious thing. And it's one of the many, many things that I love about fall.

If you're a bit hesitant about layering, I feel you. It can definitely be intimidating at first. But, I've found that, the more I experiment, the better I get. Eventually, you just get a sense of what items will layer well together or what piece you can add to any given ensemble to pump it up just a touch more.

As with most things in life, practice makes perfect. It also makes totally rad fall outfits.

Fall layered outfit: Red corduroys, Jeffrey Campbell "Everly" ankle boots, sleeveless chambray shirt, lace-front sweatshirt, lace-embellished military jacket, cross-body Phillip Lim for Target bag

Red corduroys - Pilcro and the Letterpress, Anthropologie
Sleeveless chambray shirt - Anthropologie
Lace-embellished military jacket - Anthropologie
"Everly" ankle boots - Jeffrey Campbell, Urban Outfitters
Lace-front sweatshirt - American Apparel
Necklace - J.Crew Factory
Cross-body bag - Phillip Lim for Target

signature color

Friday, October 4, 2013

Fall Recipe: Zucchini Oven Fries with Pumpkin Mustard

Fall Recipe: Zucchini Oven Fries with Pumpkin Mustard

When Ryan and I went to Columbus, Ohio at the end of August we tried eggplant fries at a restaurant. These particular eggplant fries weren't actually that good (too limp and greasy), but the idea of them inspired me to start thinking about making fries out of vegetables other than potatoes and sweet potatoes.

I let the idea percolate for a while, and it got mixed up in my late-summer zucchini obsession, which briefly overlaps my early-fall pumpkin obsession. The next thing I knew, I was whipping up a batch of these zucchini fries.

Ryan and I scarfed them down. He even devoured the pumpkin mustard, which I assumed he wouldn't so much as touch. They were officially declared a hit!

To give the fries a crispness reminiscent of, well, fries, I tossed them in an egg and then in some seasoned breadcrumbs before baking them. I only wish the breadcrumbs would have stuck better. I think you might be more successful if you shake them in a big zip-top bag, but I didn't have one, so I just rolled them around on a plate.

Fall Recipe: Zucchini Oven Fries with Pumpkin Mustard


Ingredients:
3 medium zucchini
1 egg
1/2 cup breadcrumbs
Your choice of seasonings (I used salt, black pepper, red pepper, oregano, and garlic powder.)
Cooking spray
2 tablespoons brown mustard
1 tablespoon pumpkin butter
1 teaspoon pumpkin-pie spice

Step 01. Preheat the oven to 400 degrees fahrenheit. Spray a cookie sheet with cooking spray.
Step 02. Slice zucchini into 1/4" strips, roughly the size and shape of fries.
Step 03. Mix seasonings and breadcrumbs. Toss zucchini in egg and then in seasoned breadcrumbs, working in batches if needed. Make sure to fetch the zucchini slices out of the egg with tongs and place them into the breadcrumbs, leaving the remaining egg behind. If you just pour all the egg into the breadcrumbs with the zucchini, it will be too wet.
Step 04. Spread the bread-crumb-coated zucchini on the cookie sheet in one layer. Bake for about 15 minutes.
Step 05. While the fries are baking, stir the pumpkin butter and pumpkin-pie spice into the brown mustard. 


Fall Recipe: Zucchini Oven Fries with Pumpkin Mustard

signature color

Tuesday, October 1, 2013

My October Reading List

Details on my blog: fashionisevolution.blogspot.com

01. The Strange Case of Dr. Jekyll and Mr. Hyde by Robert Louis Stevenson, 02. Dracula by Bram Stoker, 03. Frankenstein by Mary Shelley, 4. Carrie by Stephen King, 05. The Witches of Eastwick by John Updike, 06. Coraline by Neil Gaiman, 07. The Complete Stories and Poems of Edgar Allen Poe


* * *


With my new position at work, I can listen to music, podcasts, and audiobooks all day. Since Ryan works in a medical lab, he's been listening to podcasts at work for years and I've always been jealous. Now that I finally have time consume all the auditory media I want, I've set myself an audiobook-listening project for October.

First, I thought I'd read and reread all the classic horror I can get my hands on. I've never read Dracula, nor have I read Frankenstein in full. While I've read a lot of Poe stories, I haven't read all of them, and there's also The Strange Case of Dr. Jekyll and Mr. Hyde, an old favorite that I've wanted to revisit for a while now.

If I get through all of those and still have time, I'd like to read a few more-contemporary titles as well. But, if I can't fit them all in, there's always next year.

Is it strange that I don't like horror movies at all but I like classic pieces of horror fiction? I think it's all about the style of the writing; I have such an admiration for the writers on this list. Somehow they can make the horrible beautiful, and that's what makes gothic fiction so special I think.  

Do you like reading scary stories around Halloween? What are your favorites?


signature color